Using Headsets with FusionHub
This page contains tutorials for getting the most popular mixed and augmented reality headsets running with FusionHub. The LP-Research product names map to the sections as follows:
| Product | Setup | Section |
|---|---|---|
| LPVR-CAD | Tethered headset in a room or seating buck. The headset IMU is fused with outside-in optical tracking. | Varjo XR-4 |
| LPVR-AIR | Wireless headset streamed from SteamVR. The headset’s inside-out tracking is fused with outside-in optical tracking. | Apple Vision Pro, Meta Quest, VIVE Focus Vision |
| LPVR-DUO | Headset on a moving platform, with a platform IMU that removes the vehicle motion. | LPVR-DUO with Varjo Headsets, Xreal |
All setups take their global reference from an outside-in optical tracking system. Preparing it is described in Optical Tracking with ART DTrack, installing FusionHub and activating a license in Getting Started.
Varjo XR-4
This is the LPVR-CAD setup for a tethered Varjo headset.
Requirements:
- Varjo Base - https://varjo.com/downloads/
- Varjo XR-4 HMD with marker target
- Optical tracking system, LPVISION, ART or Optitrack
The photos below show the Varjo XR-4 with the ART marker target attached.
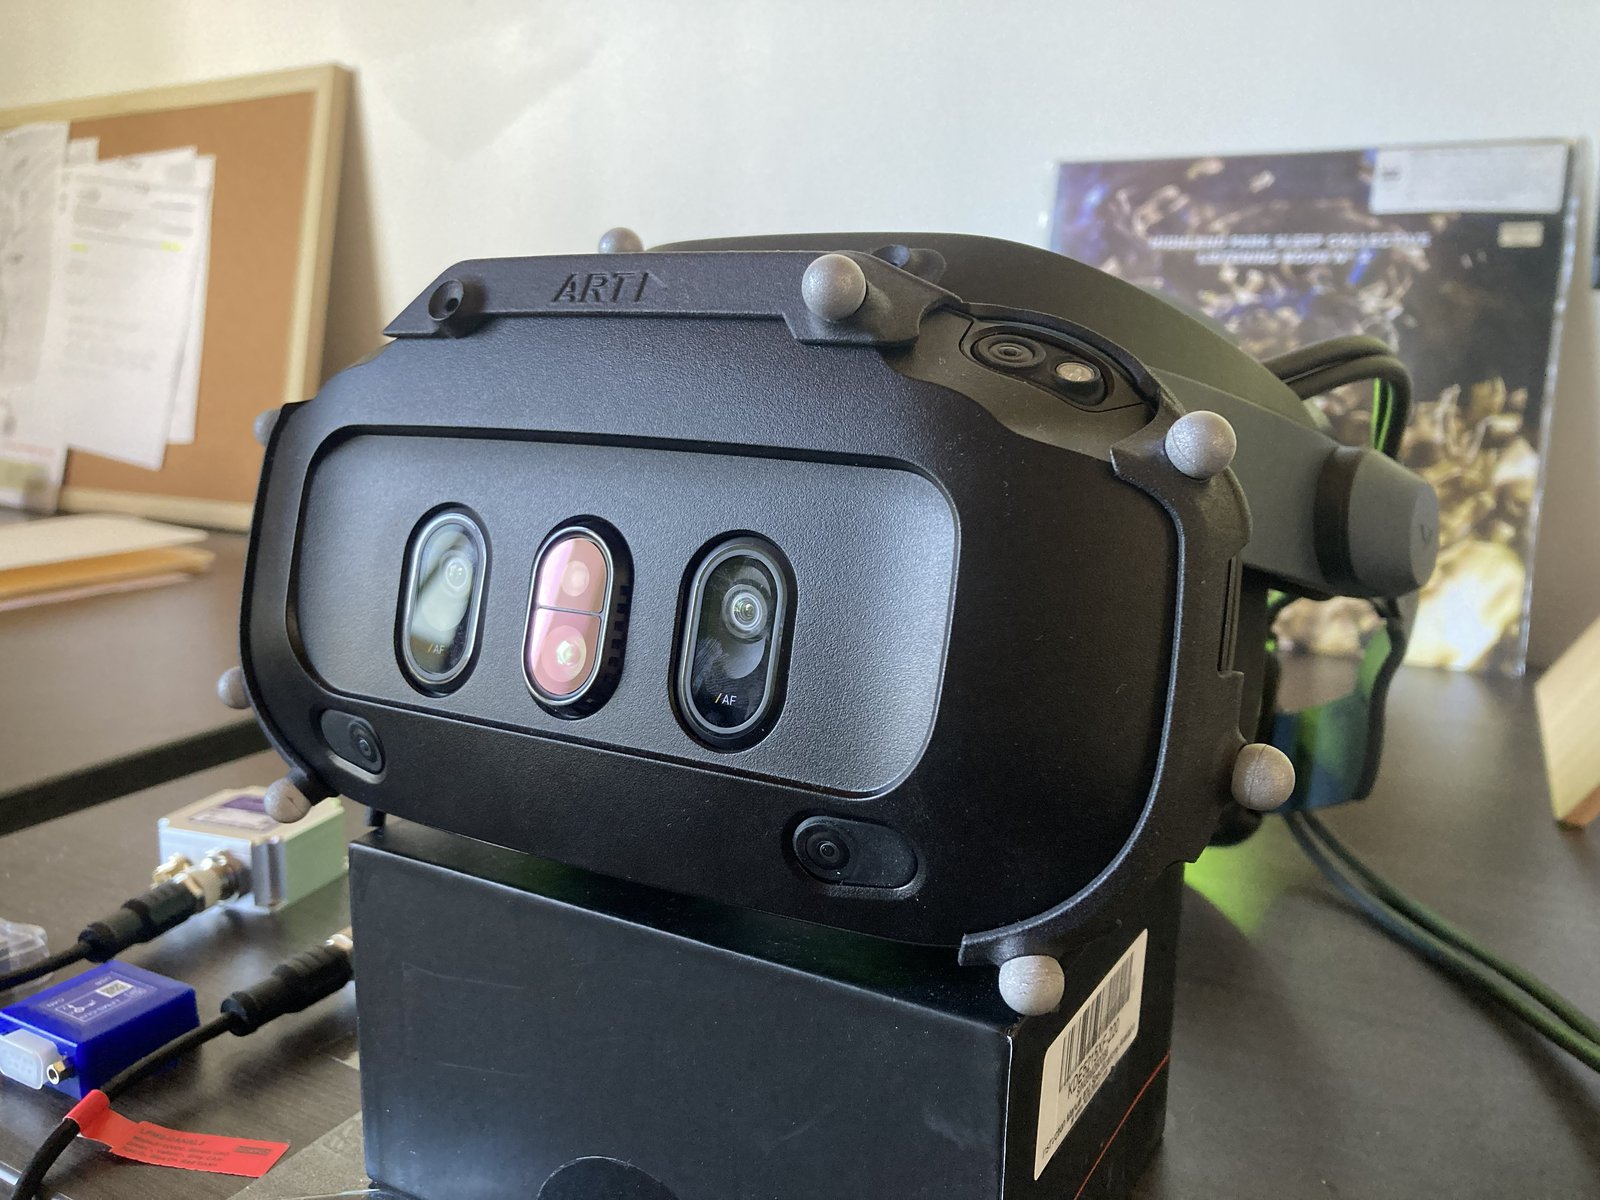
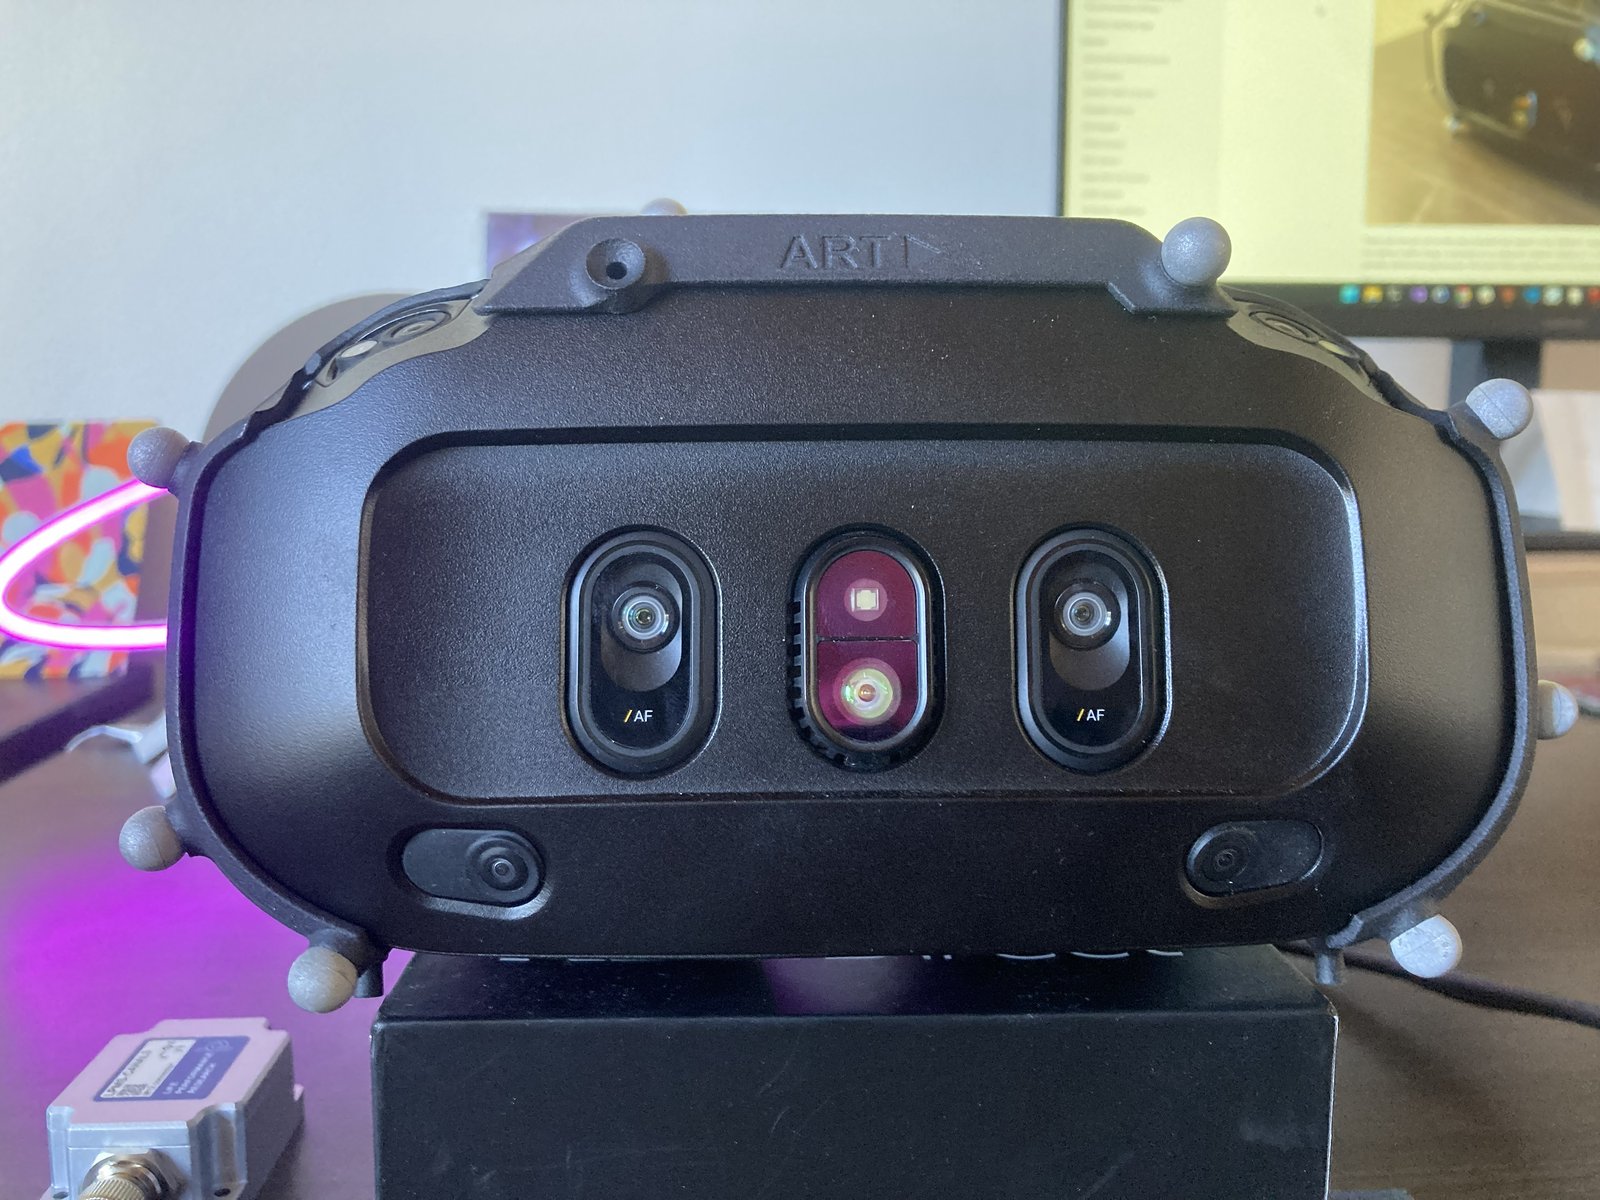
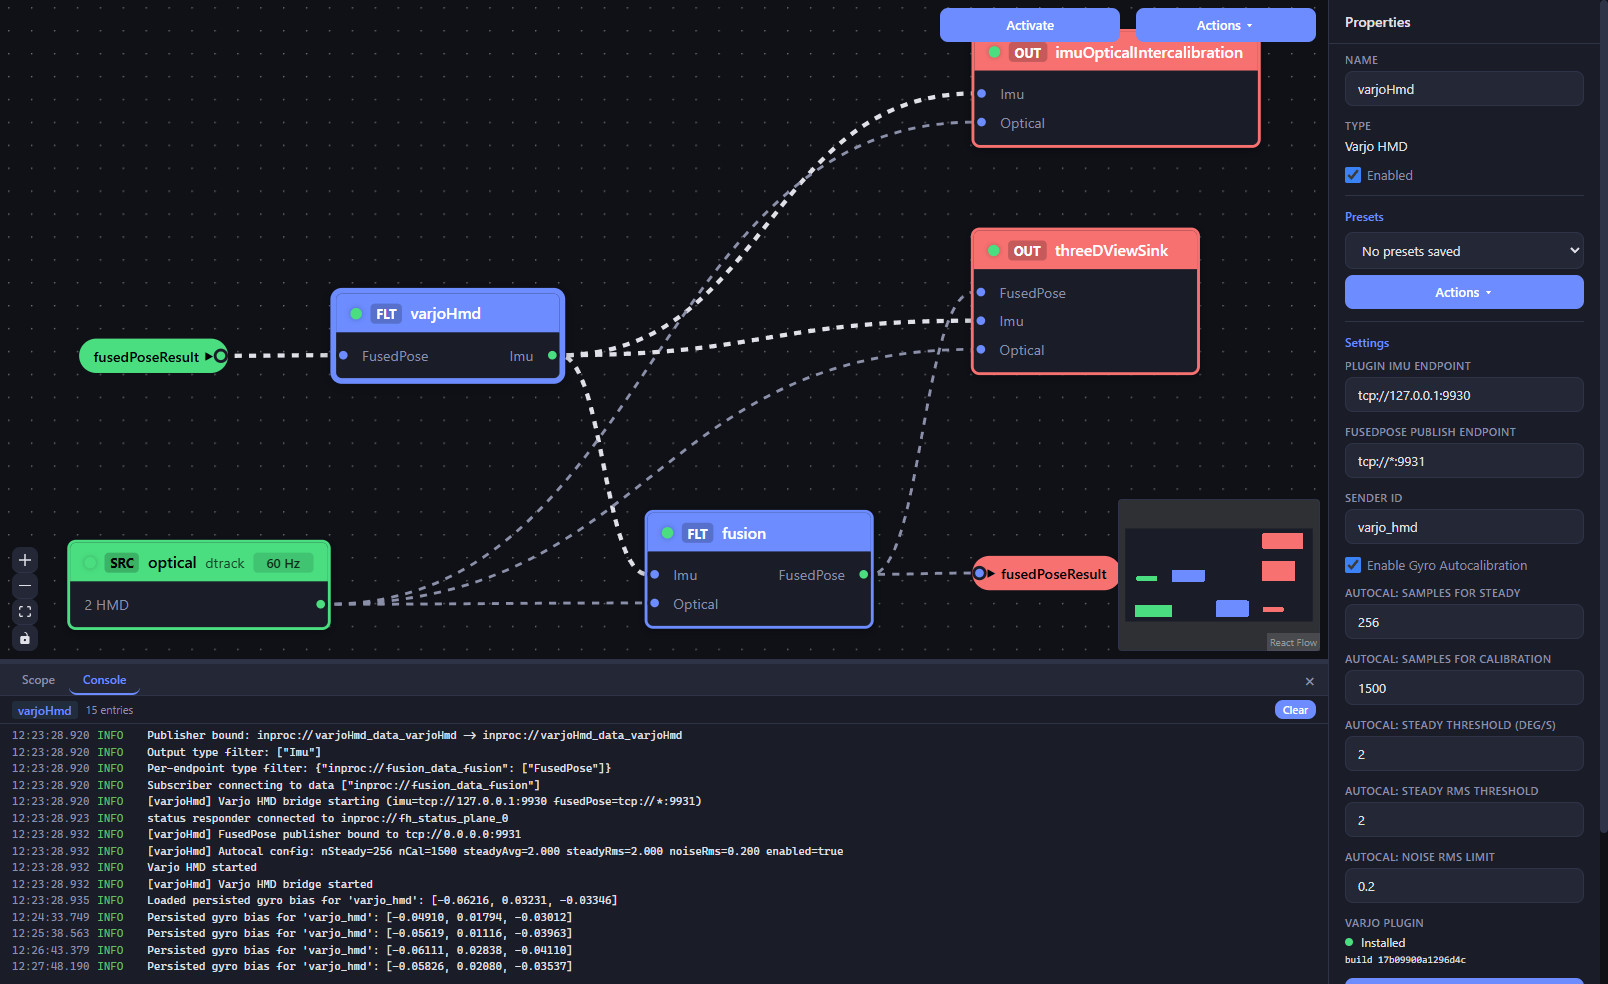
- In your workspace load the configuration for LPVR-CAD Varjo XR-4. This is our standard graph for Varjo setups: an optical tracking source (DTrack Optical in this example) and the Varjo HMD node feed the IMU-Optical Fusion filter, and the fused pose routes back into the Varjo HMD node through the fusedPoseResult connector, which delivers it to Varjo Base for rendering. The IMU-Optical Intercalibration node is used for the alignment calibration described below, and the 3D View sink visualizes the tracking data.
- Make sure your XR-4 is connected to your computer and shows as connected in Varjo Base.
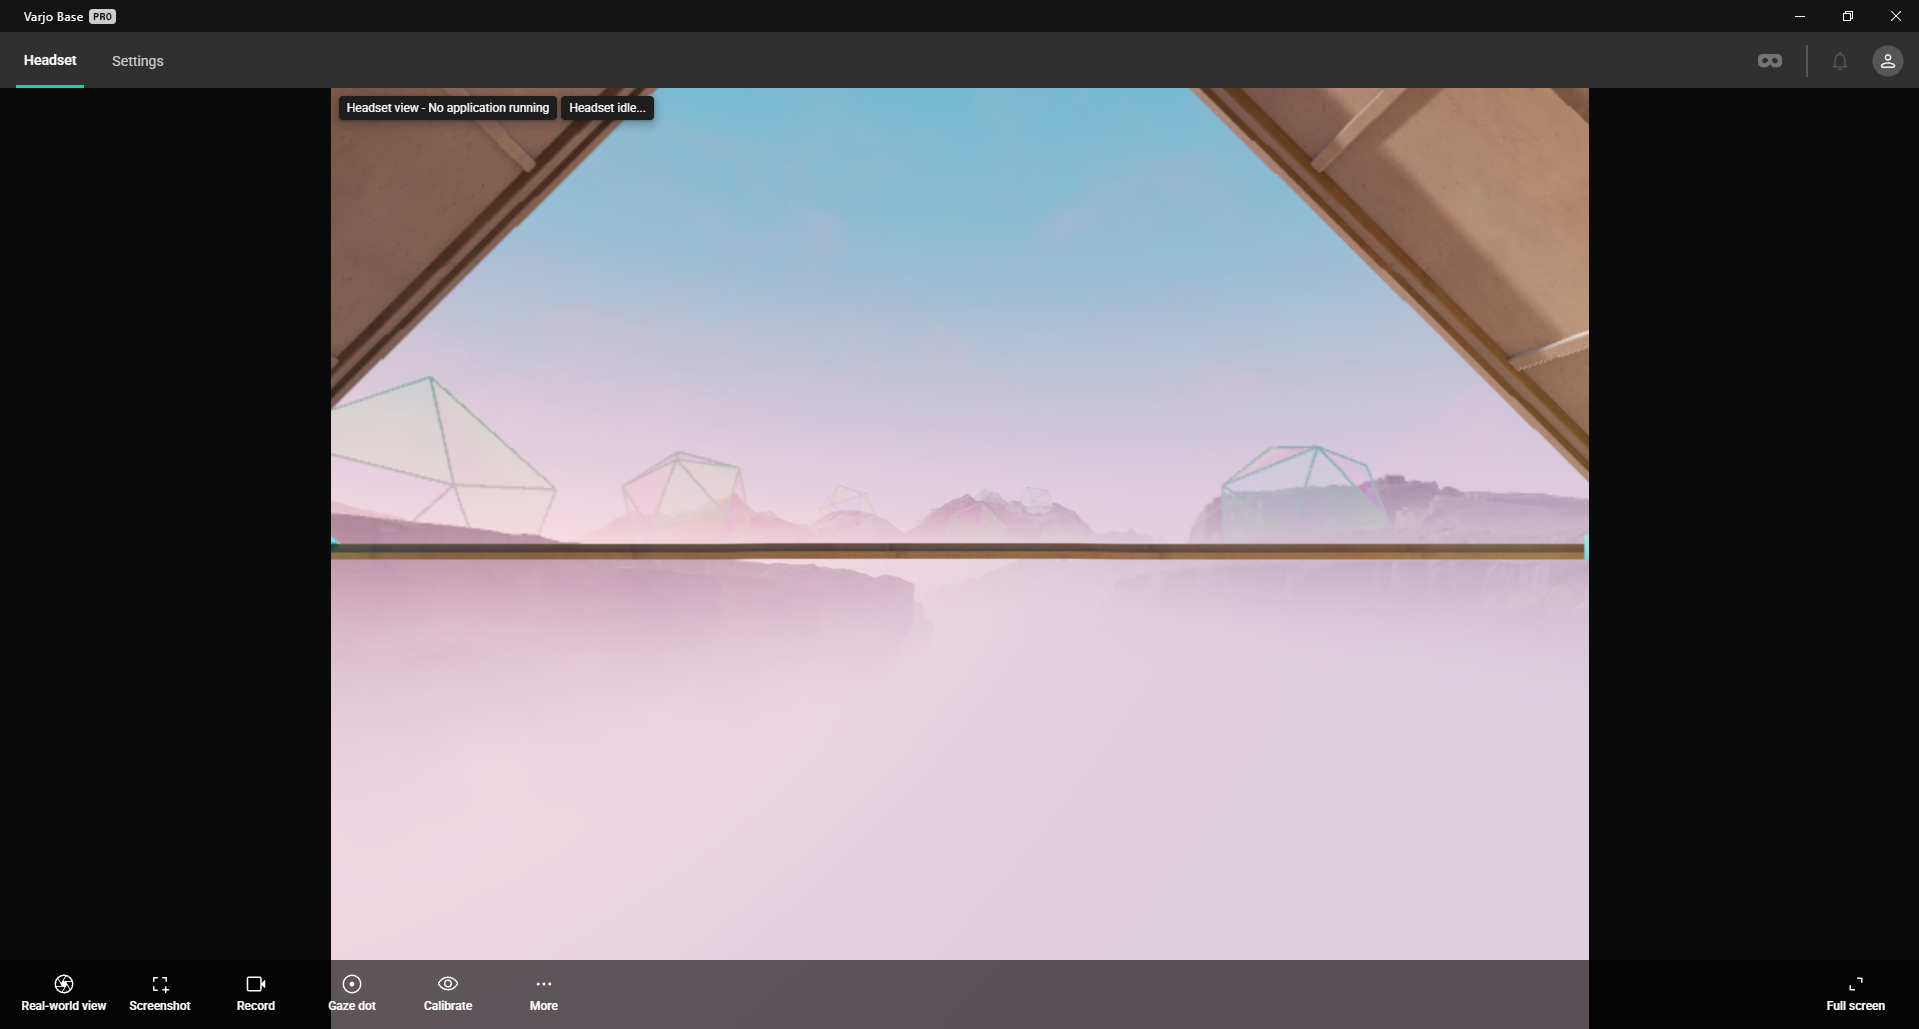
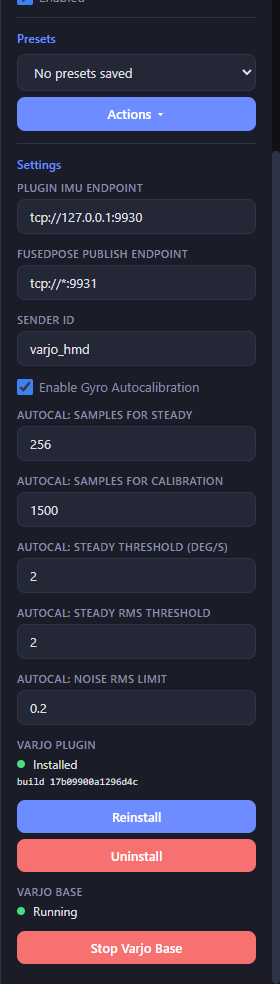
- In FusionHub inspect the properties of the Varjo HMD node. It shows the option to install or re-install the LPVR tracking plugin for Varjo Base. Click Install to install the plugin, then click Start Varjo Base. Varjo Base scans for tracking plugins at startup, so if it was already running during the installation, stop and start it again from this panel.
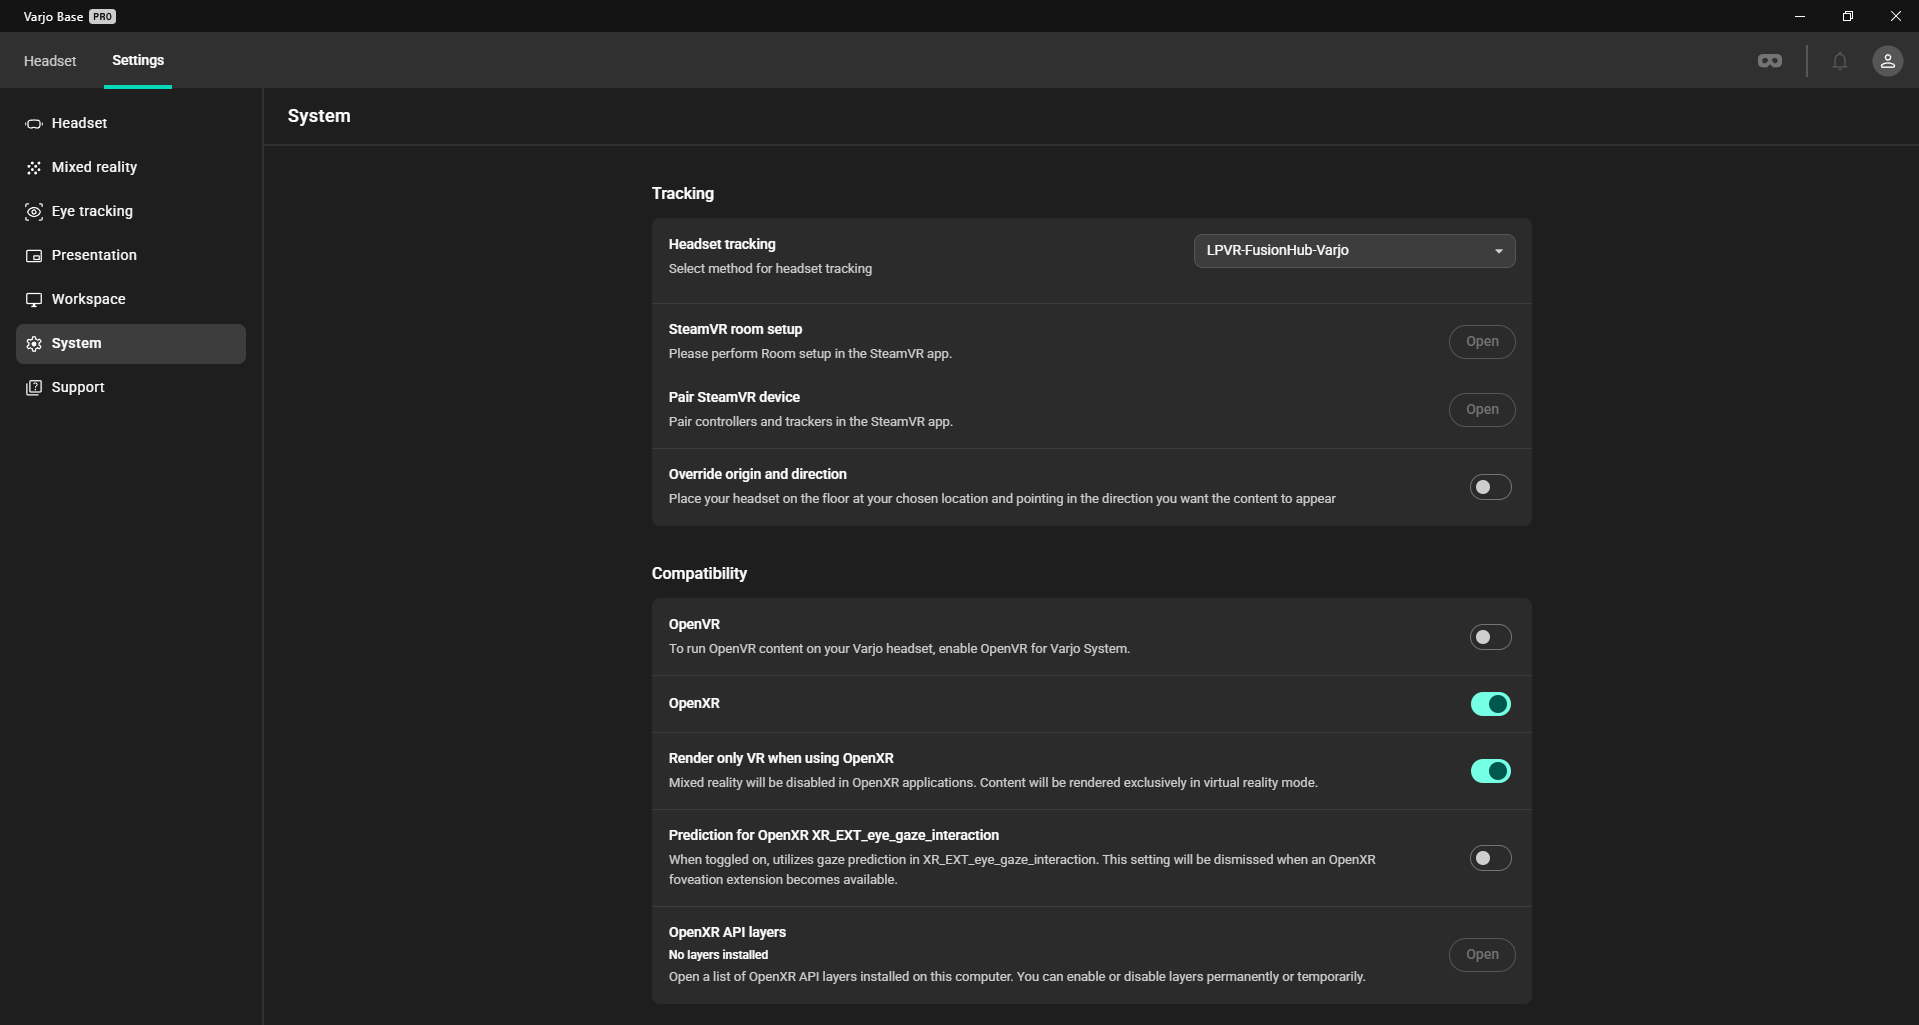
- In Varjo Base go to Settings, open the System page and under Headset tracking select LPVR-FusionHub-Varjo. Varjo Base now takes the headset pose from FusionHub instead of its built-in inside-out tracking.
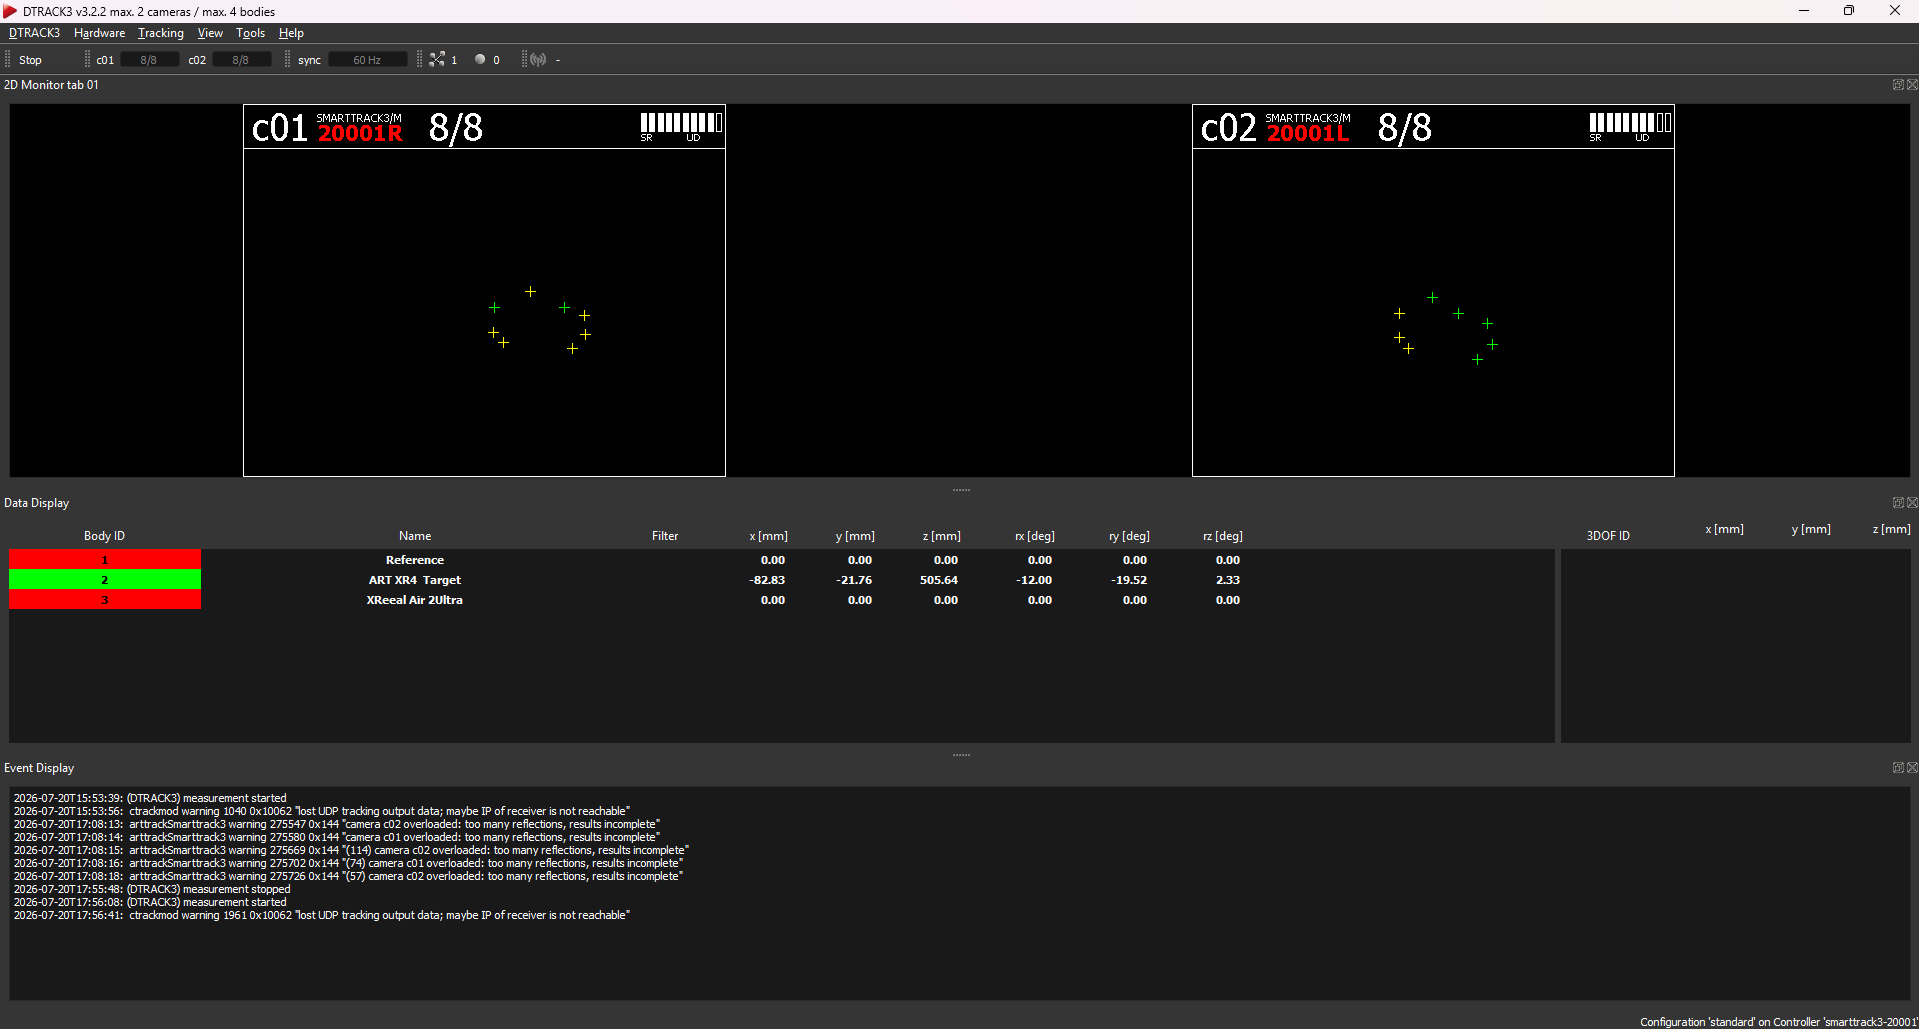
- Set up your optical tracking system as described in Optical Tracking with ART DTrack: calibrate the marker target of the XR-4 as a body in DTrack, start the measurement and direct the UDP output to the FusionHub computer. Below you see the XR-4 marker target tracked in DTrack.
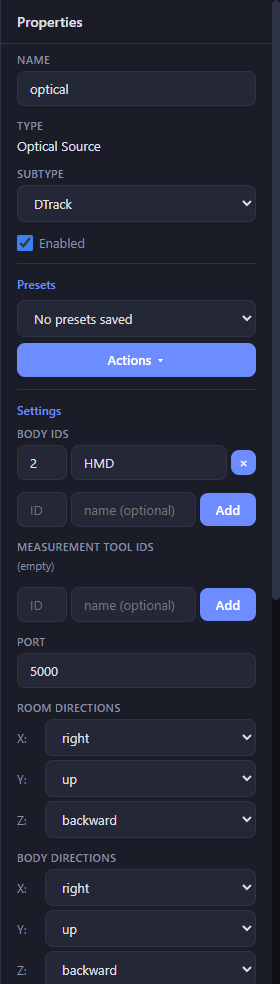
In the properties of FusionHub’s optical source node, select the DTrack subtype and enter the body ID of the headset target and the UDP port DTrack sends to. Once the measurement is running, the optical node receives the headset pose.
- Calibrate the alignment between the headset IMU and the optical marker body as described in the Varjo XR-4 section of the Headset Calibration Tutorials. This is needed once per marker target. Once the calibration is applied, put on the headset and confirm the rendered scene is stable and globally referenced.
Controllers. The XR-4 controllers are handled by Varjo Base and tracked relative to the headset, so FusionHub needs no configuration for them. Enable them in Varjo Base only when you use them, since they add USB traffic, and restart Varjo Base after enabling them. VIVE or Index controllers and other physical objects are tracked optically instead, see Additional bodies.
Apple Vision Pro
This is the LPVR-AIR setup. It streams the image of a SteamVR application (Autodesk VRED, Unity, Unreal, …) over Wi-Fi to the Vision Pro and fuses the headset’s own inside-out tracking with outside-in optical tracking, which gives several headsets in a large tracking volume a common, drift-free reference. The PC side runs entirely inside FusionHub: the ALVR Bridge node receives the native pose and IMU data from the headset, the Inside-Out Fusion filter combines them with the optical pose, and the fused pose is streamed back into the headset’s video pipeline. The Vision Pro runs the LPVR-AIR Client, an unlisted App Store app. VR streaming is available in the Windows version of FusionHub only.
Requirements:
- A Windows PC with SteamVR on the same Wi-Fi network as the Vision Pro, ideally a dedicated one - see Wireless Streaming: Network and Troubleshooting
- Optical tracking system with a marker target on the Vision Pro, see Optical Tracking with ART DTrack
- The App Store link for the LPVR-AIR client, provided by LP-Research
-
On the Vision Pro open the App Store link in Safari and install LPVR-AIR Client v4. The click-through is shown in Updating the Vision Pro Client. On the first start the client asks for several permissions. Grant all of them; the Allow button is sometimes at the top and sometimes at the bottom of the dialog. A refused permission makes the client connect and disconnect endlessly later on.
-
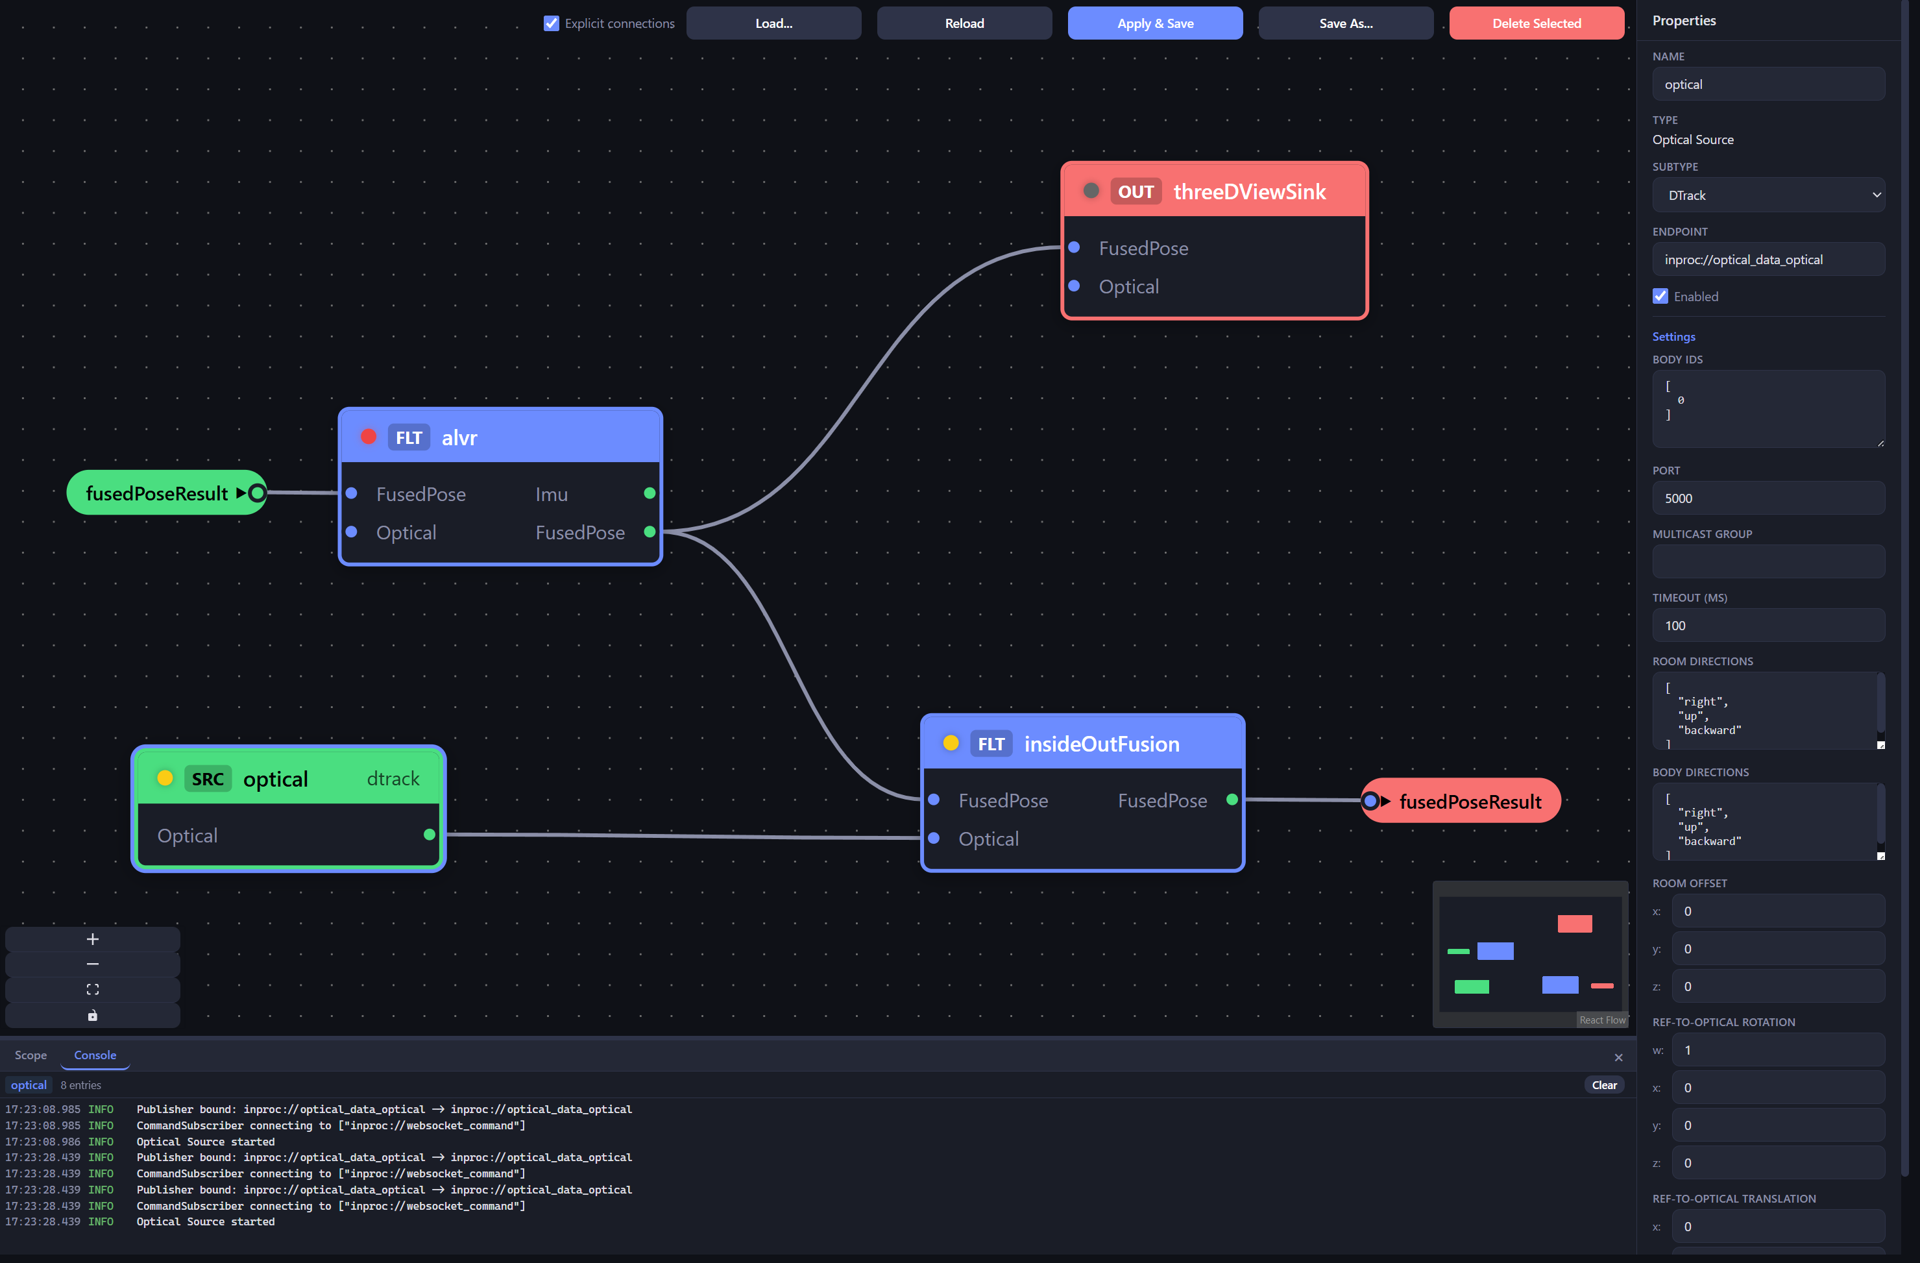
Load the LPVR-CAD Vision Pro (Inside-out fusion) configuration into FusionHub.
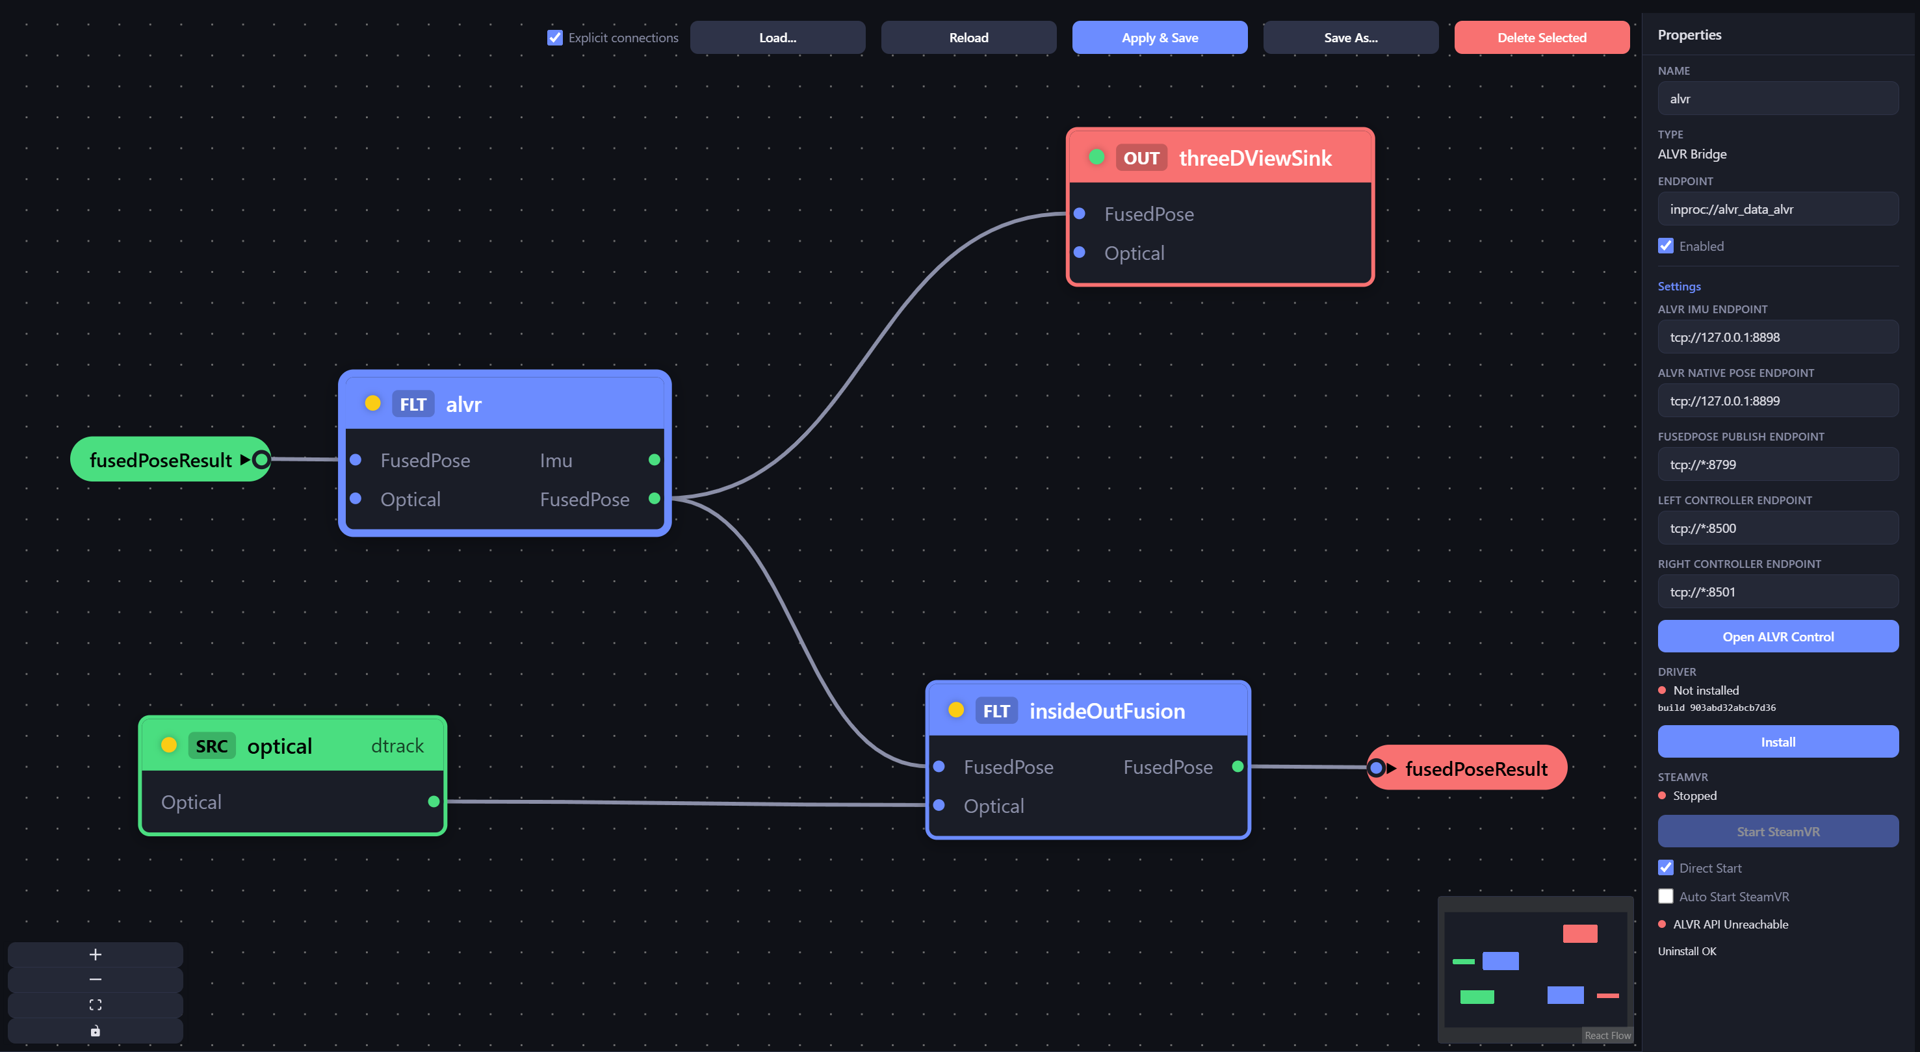
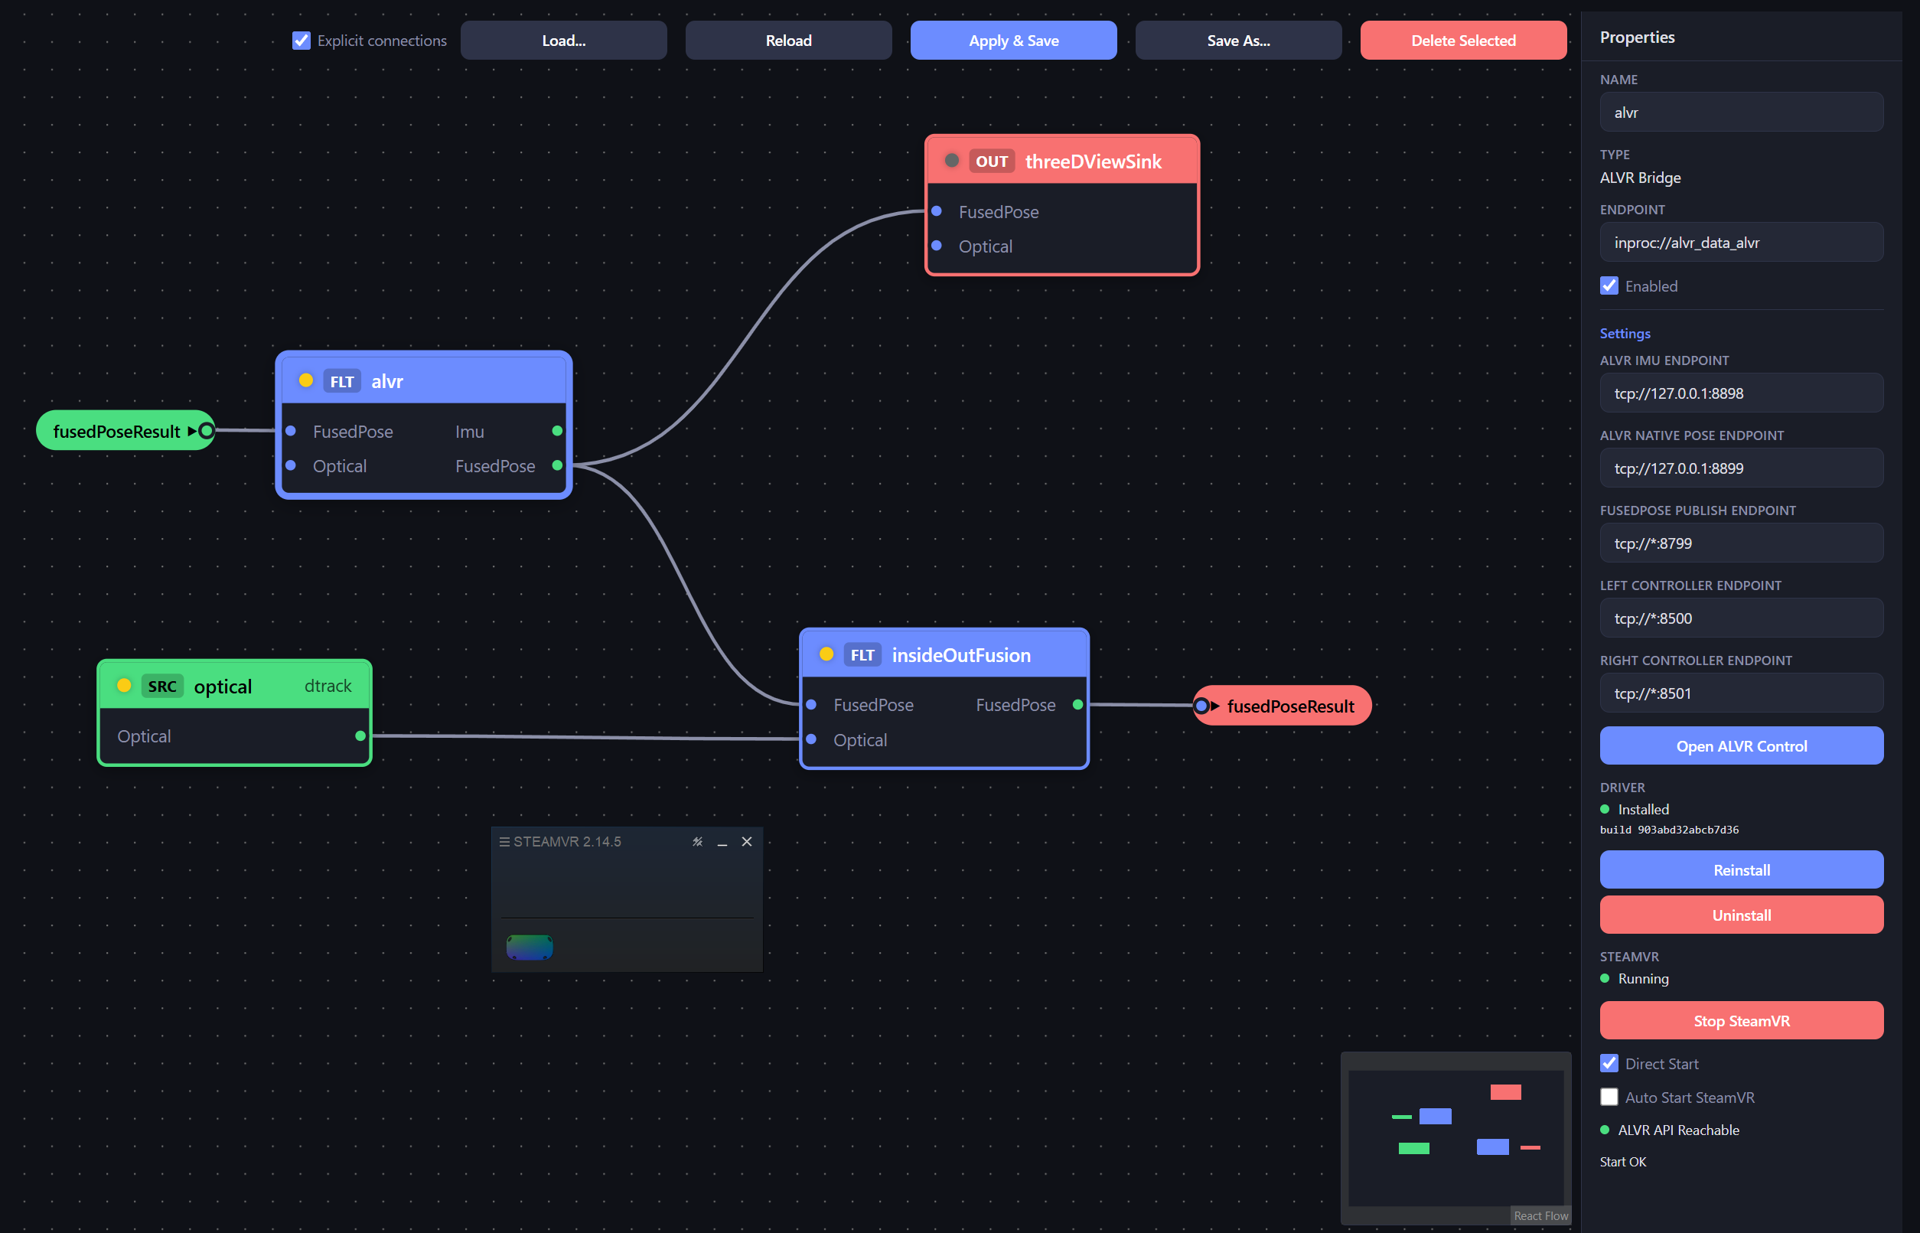
- In the properties of the ALVR Bridge node click Install driver to install the ALVR driver into SteamVR (only needed once), then Start SteamVR. SteamVR may restart once after it detects the headset.
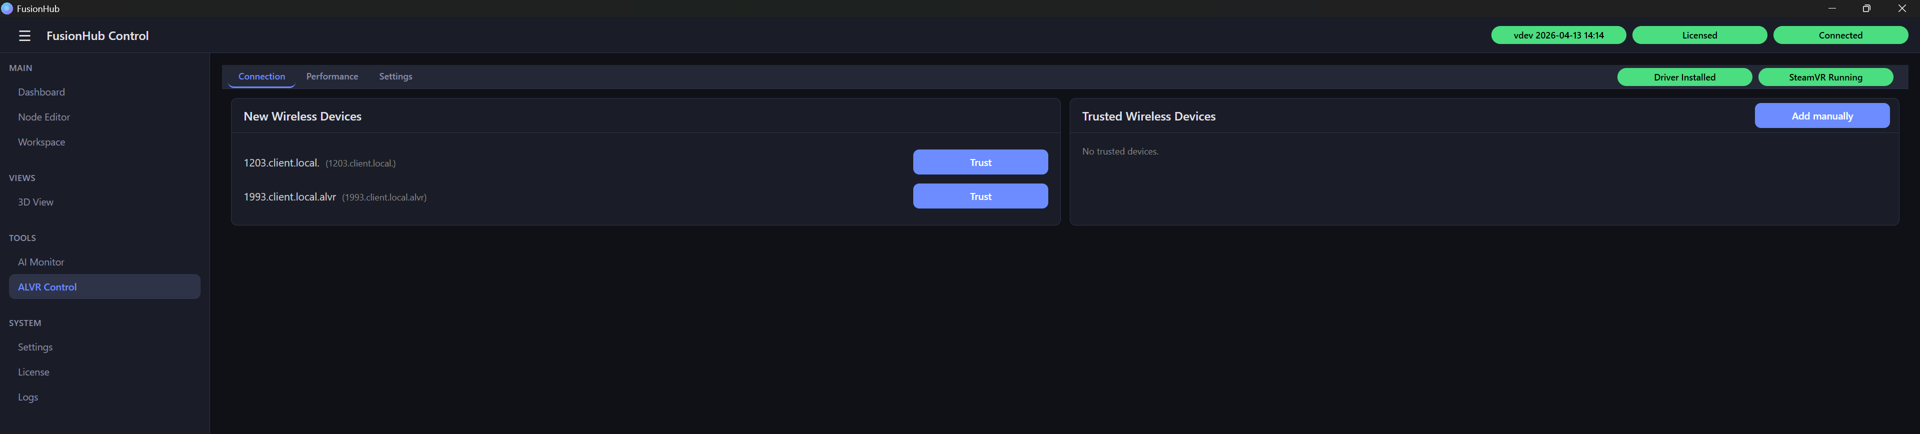
- Put on the Vision Pro and start the client. It shows “searching for streamer” and announces itself to FusionHub. On the ALVR Control page click Trust next to the ID of your client in the New Wireless Devices panel. The client connects, and on the Vision Pro “connecting” changes to Enter.
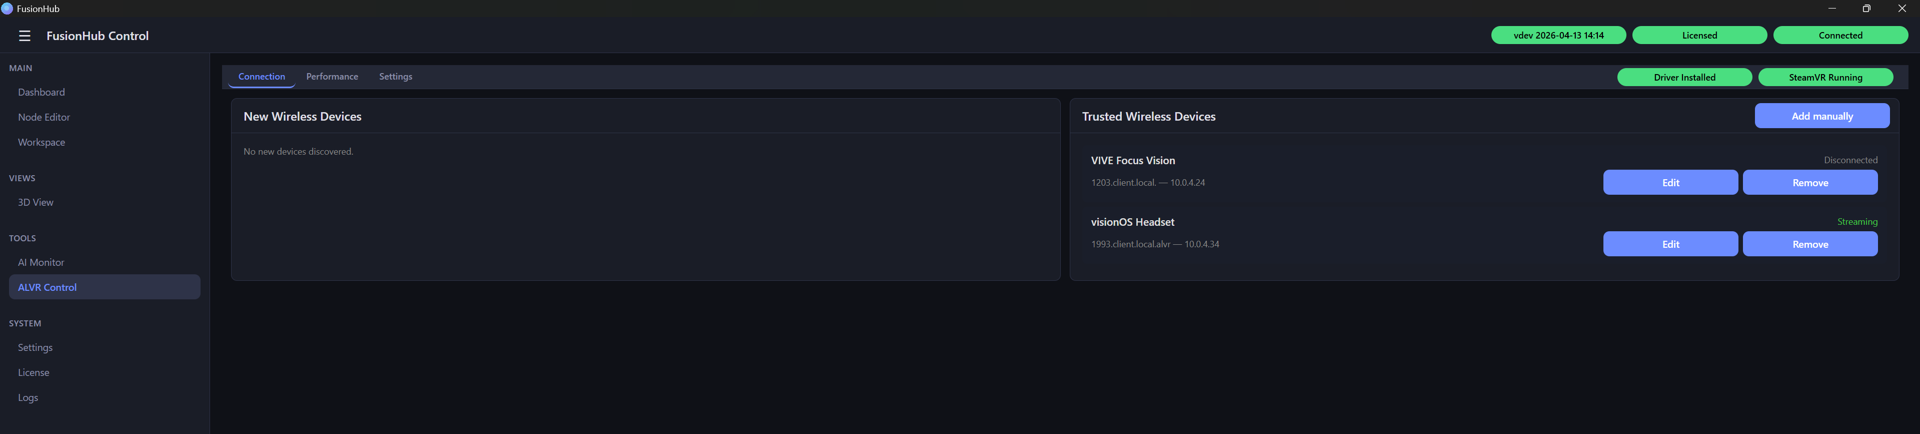
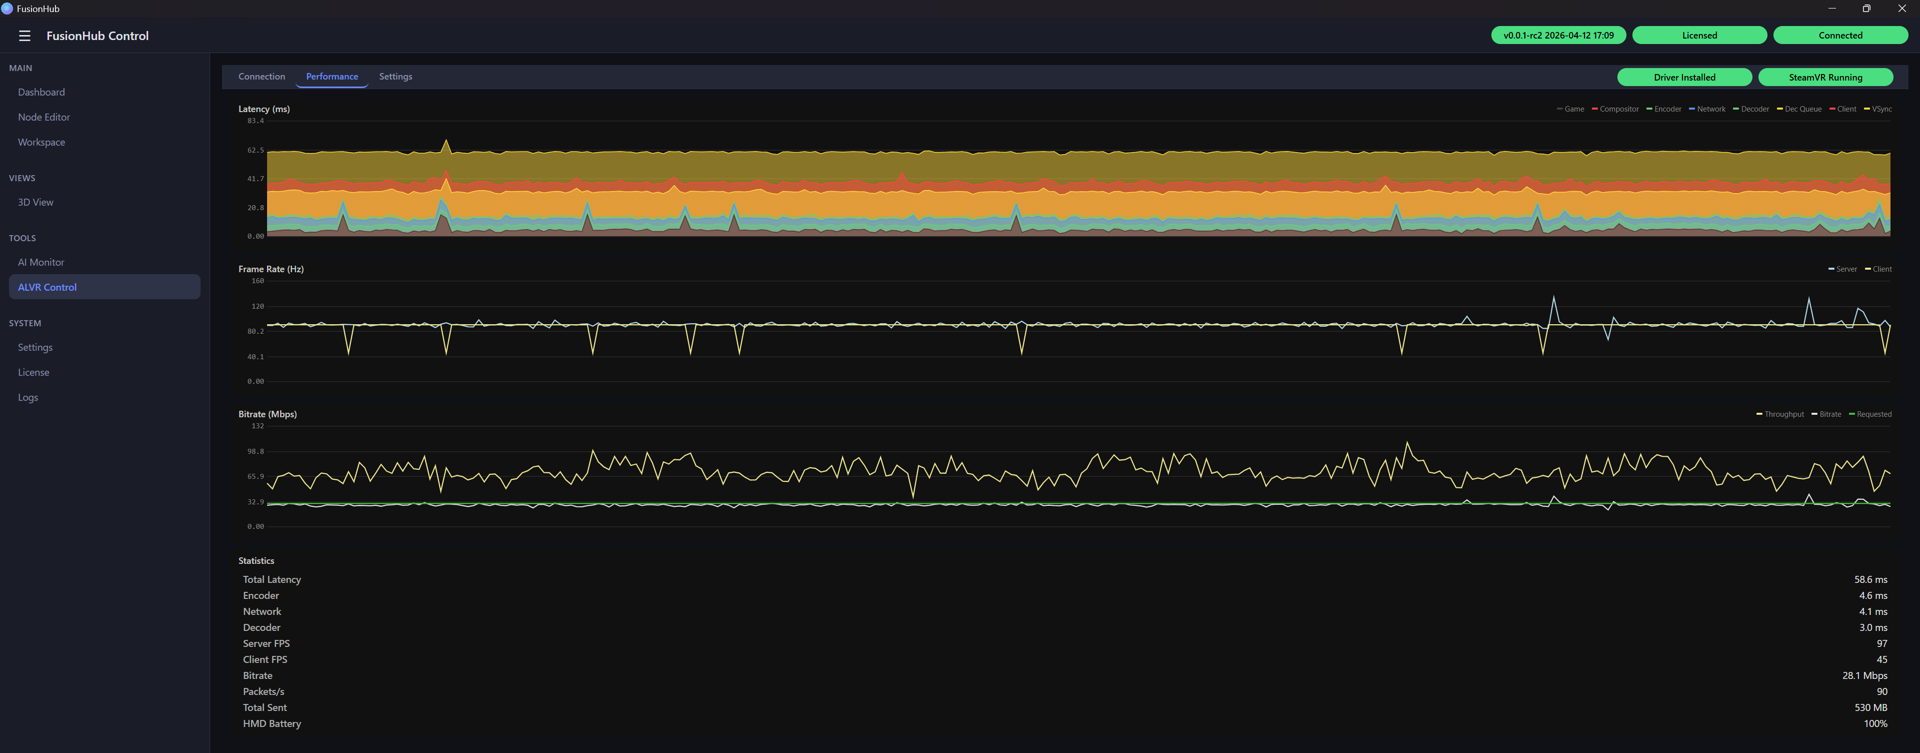
- In the ALVR settings set Tracking mode to FusionHub, so the head pose comes from the fusion pipeline instead of the headset’s own tracking. Then tap Enter Mixed Reality on the Vision Pro. You see the SteamVR home environment. The performance tab of the ALVR Control page shows the status of the stream.
- In the properties of the optical node enter the body ID of the Vision Pro target and the DTrack port, as for the XR-4 above. On the Dashboard the optical node and the ALVR Bridge should both show increasing counters. Then optical tracking, headset and FusionHub are connected.
-
Calibrate the transform between the marker target and the headset’s inside-out frame as described in the Apple Vision Pro section of the Headset Calibration Tutorials. This is needed once per marker target.
-
Start your SteamVR application. Leave the client window on the Vision Pro open and move it aside if you want to leave and re-enter the application. Closing it means starting and trusting the client again.
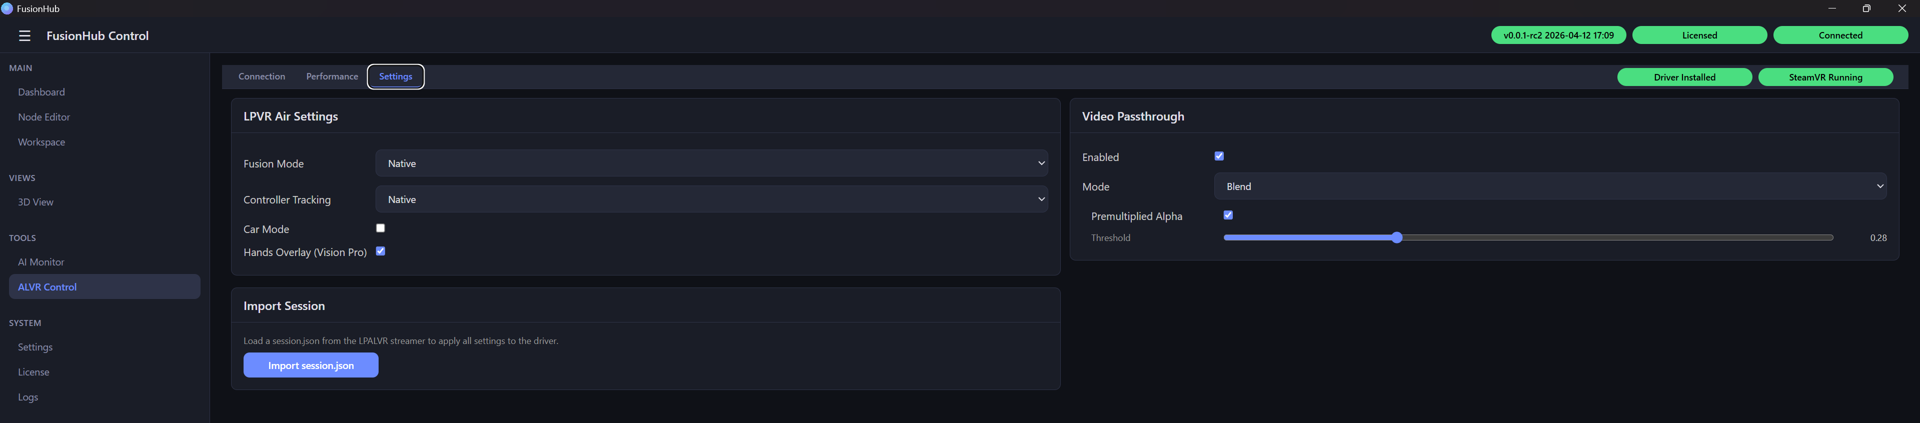
Passthrough. For mixed reality, turn on the headset’s video passthrough in the ALVR settings: Passthrough switches it on, Passthrough mode selects between Blend and the RGB or HSV Chroma Key, which makes a chosen colour of the rendered image transparent like a green screen, and Passthrough blend sets the transparency threshold of the Blend mode. The same controls can be placed on the operator panel, see ALVR Panel Mode with Apple Vision Pro for running sessions from a single screen.
If the connection is unstable or the image jitters, see Wireless Streaming: Network and Troubleshooting.
Meta Quest or VIVE Focus Vision
- Install the provided LPVR-AIR client on your headset using the Sidequest advanced installer.
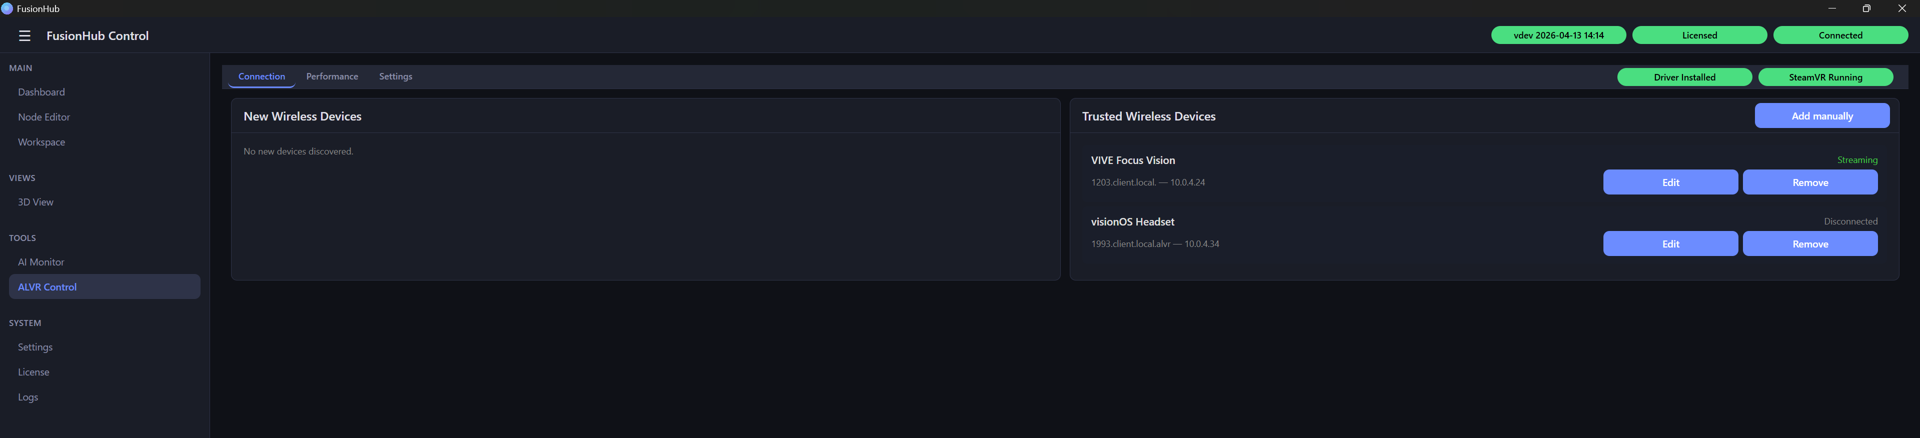
- The FusionHub side of the setup for Meta Quest and VIVE Focus Vision is identical to the Vision Pro installation described above. Instead of the Vision Pro HMD being shown as streaming data you’ll see the Meta Quest or Focus Vision in the list. The network requirements are the same, see Wireless Streaming: Network and Troubleshooting.
Xreal One Pro
Requirements:
- SteamVR - https://store.steampowered.com/app/250820/SteamVR/
- Xreal One Pro HMD with marker target
- Thunderbolt-compatible USB-C adapter
- Optical tracking system, LPVISION, ART or Optitrack
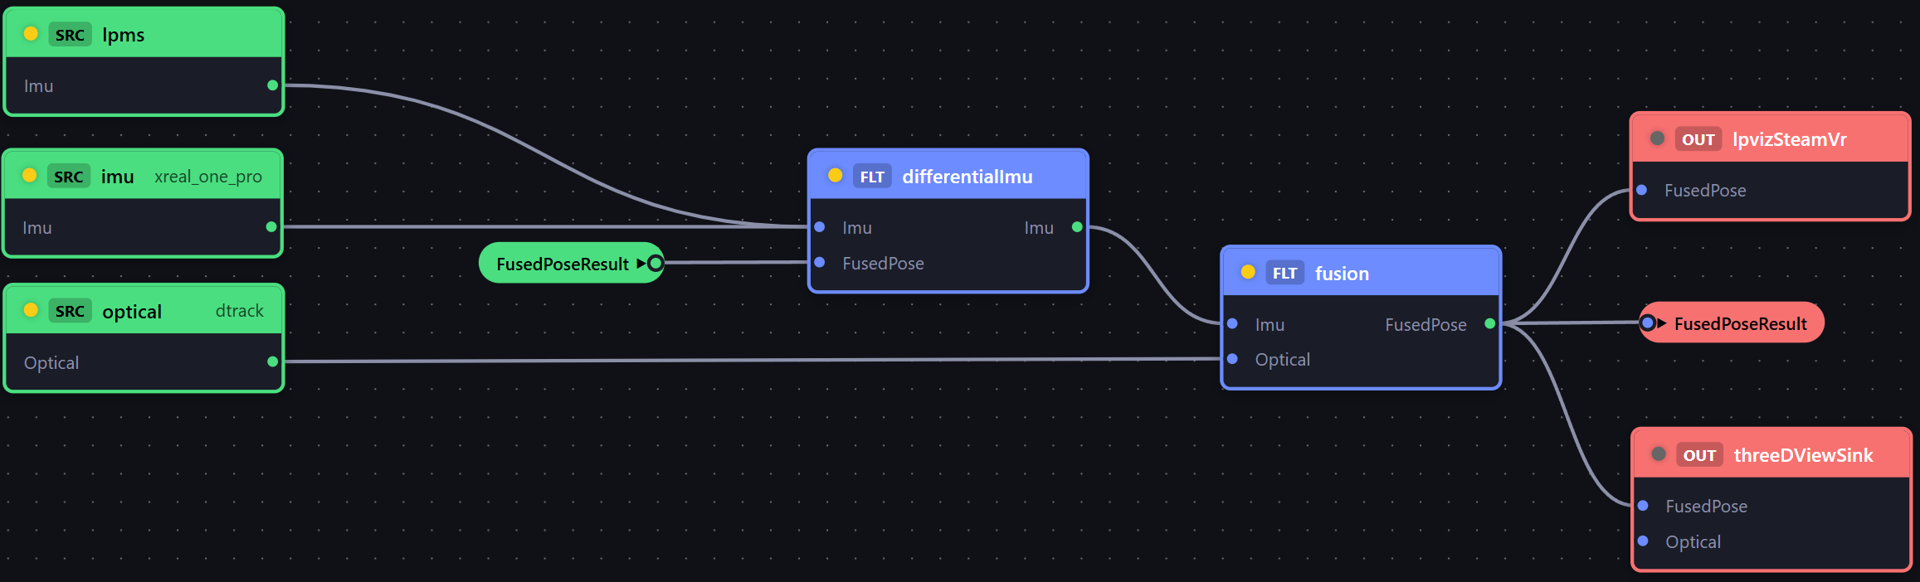
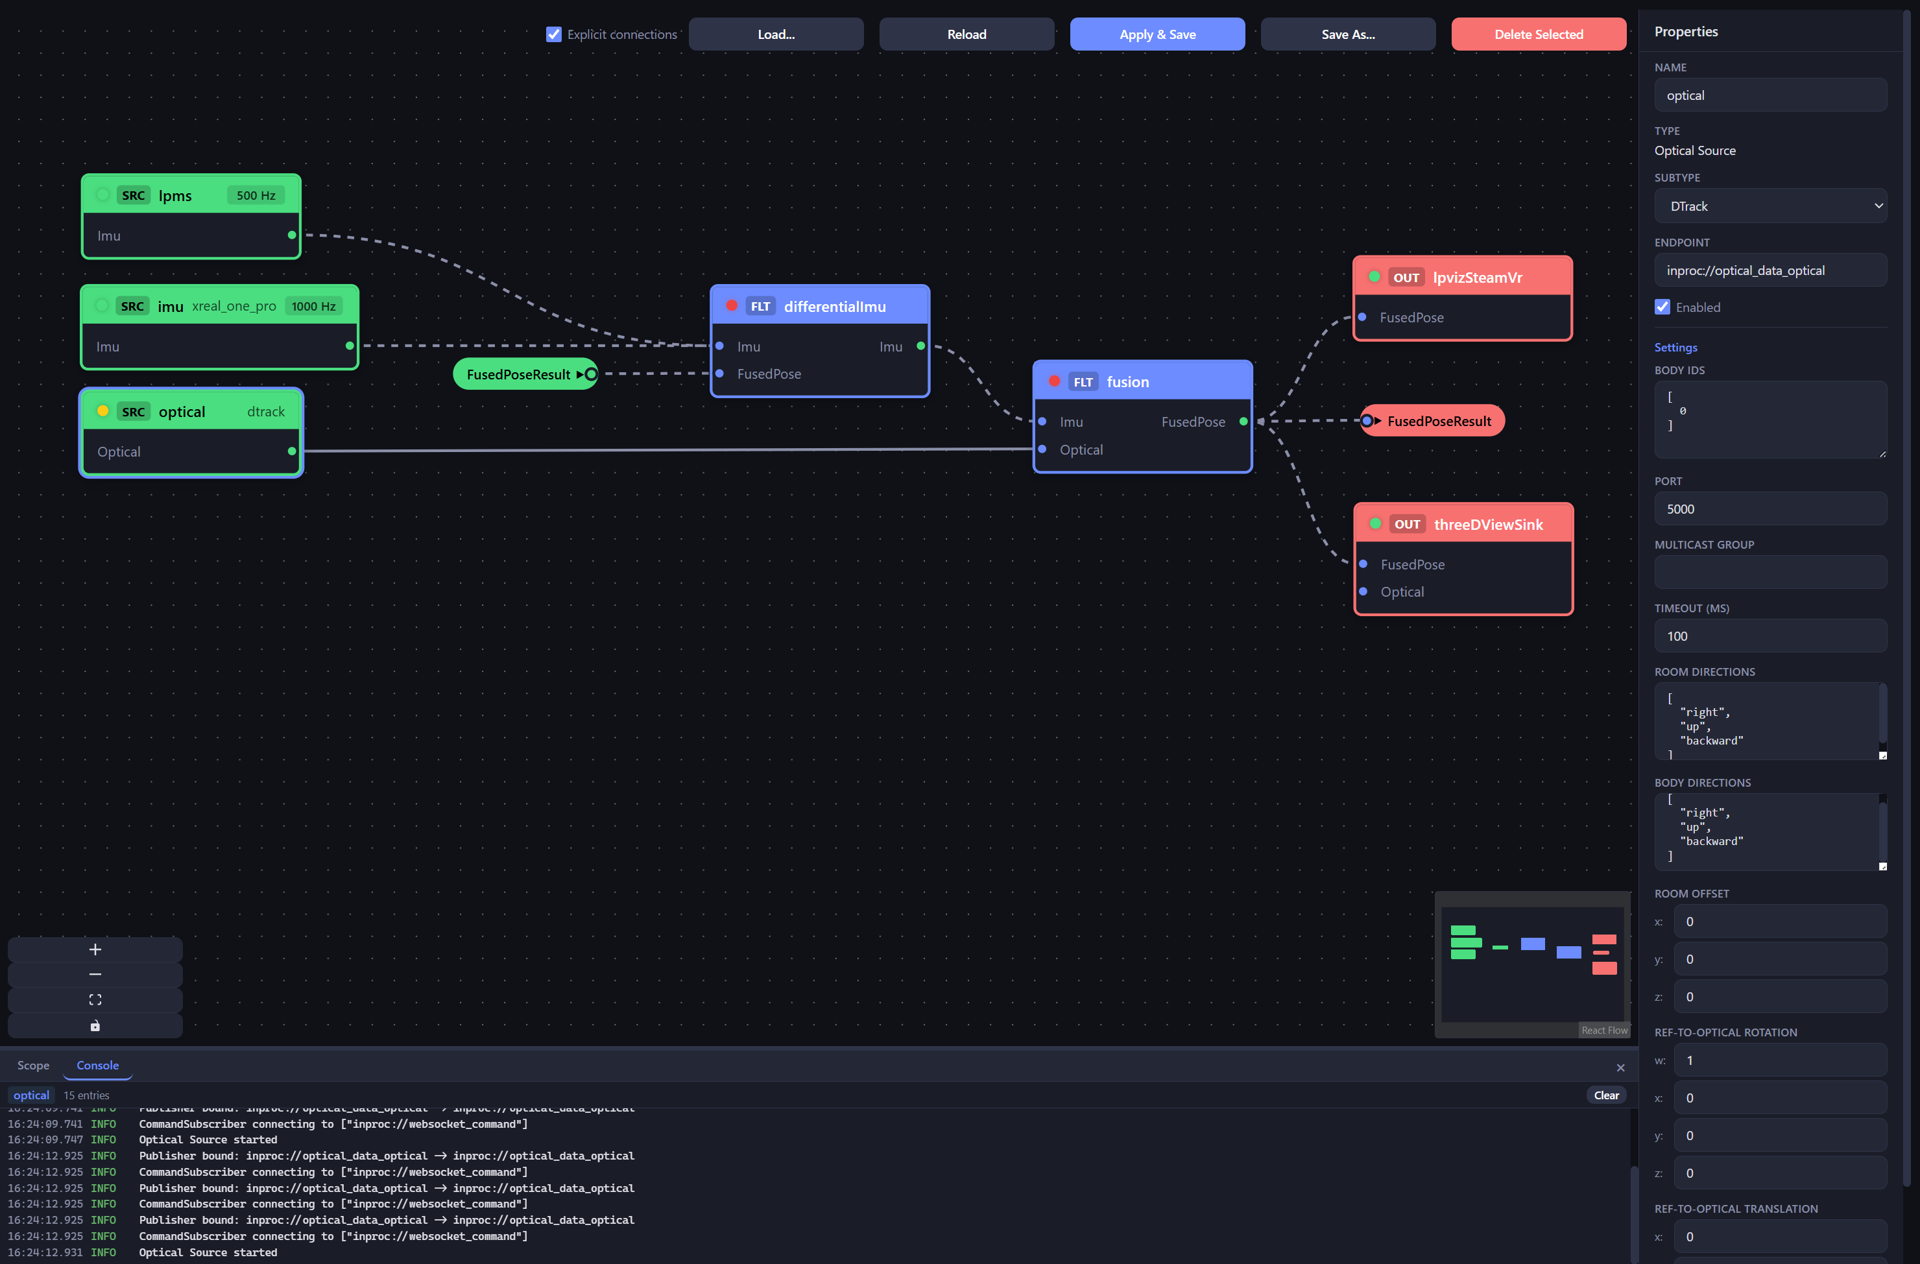
- In your workspace load the configuration for LPVR-DUO Xreal One Pro.
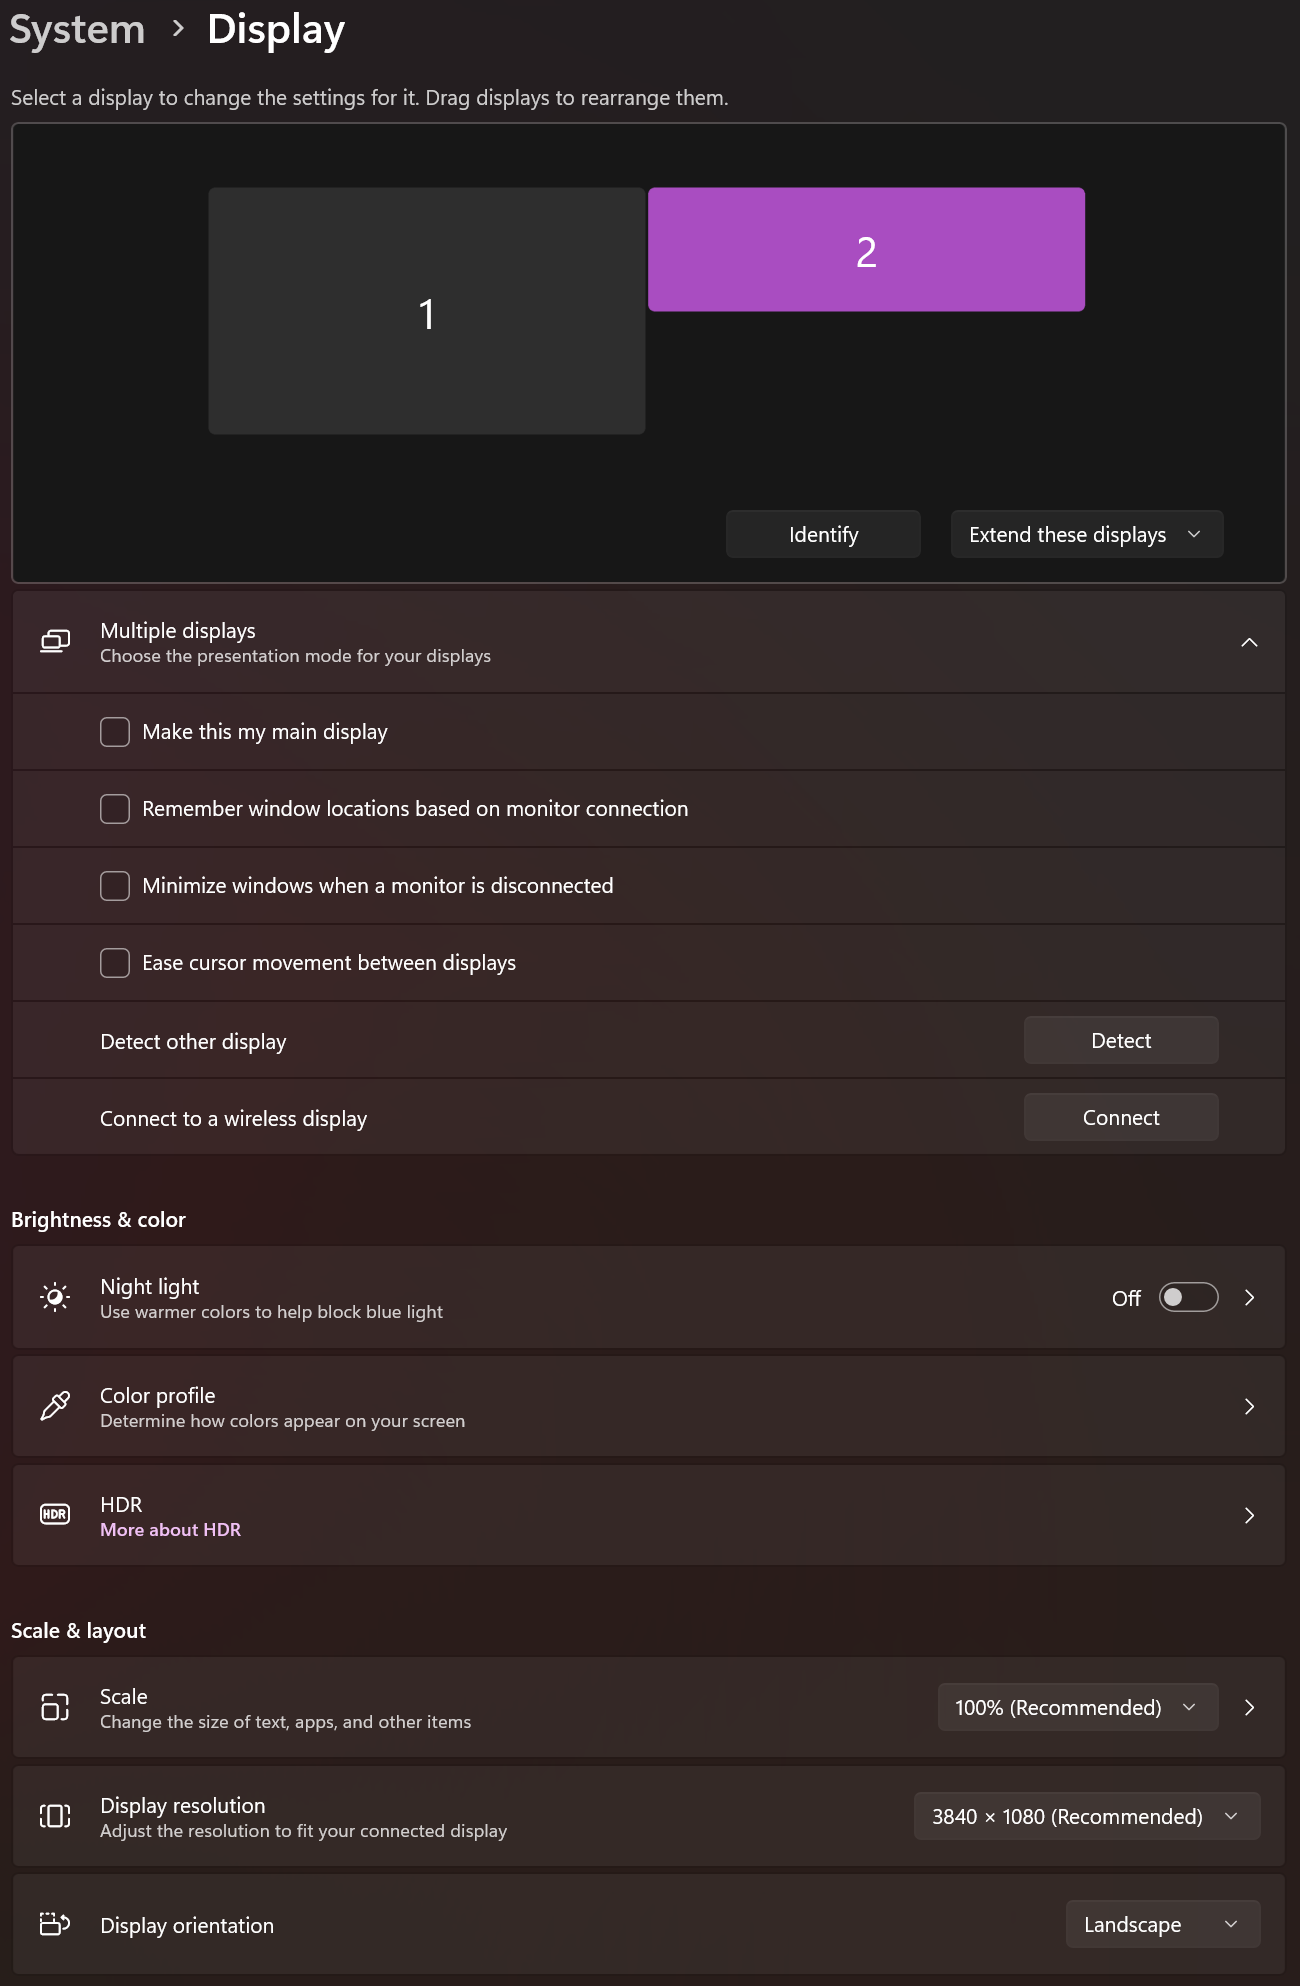
Make sure your Xreal One Pro is connected to your computer. The Xreal One Pro must be connected to your computer via a Thunderbolt-compatible USB-C port (DisplayPort via USB-C). You can easily find out if your port supports Thunderbolt by connecting the Xreal headset and checking if it shows up as separate display in Windows display settings.
Adjust the menu settings on the Xreal One Pro:
To enter the on screen menu, double click button on bottom of hmd to go to menu.
In Spatial Screen settings:
- Set 3D mode -> Full side-by-side
- Set Stabilizer -> Off
Adjust Shortcut settings:
- Click -> Electrochromic dimming
- Long press -> Full SBS
- Double click -> None
Now whenever you long-press the top button of the Xreal One Pro HMD, the HMD will switch to full side-by-side mode. A useful shortcut. Full side-by-side mode is required for our display driver to work.
The HMD should show up as an additional screen as shown below:
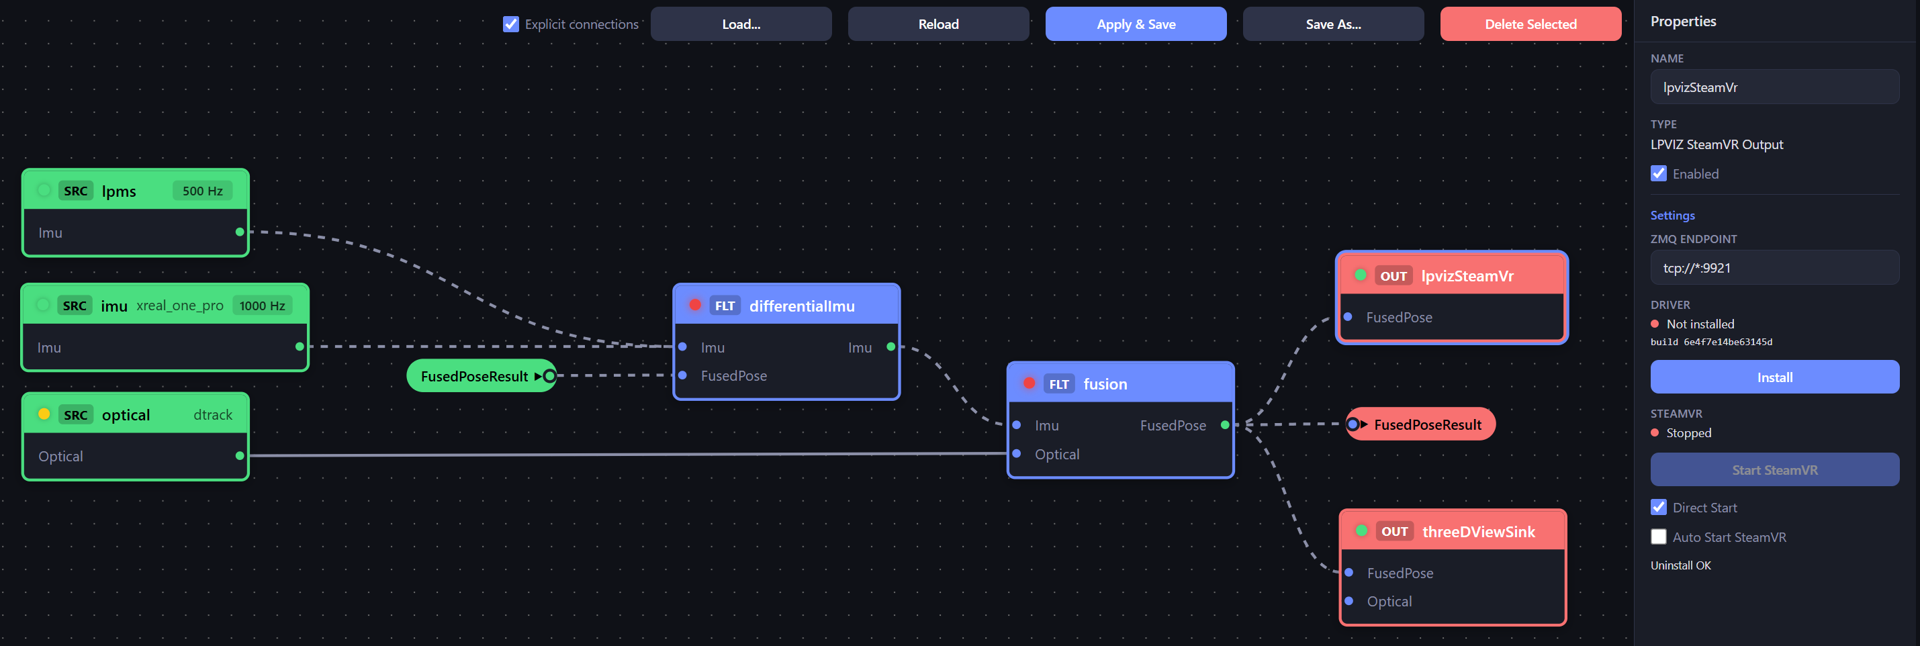
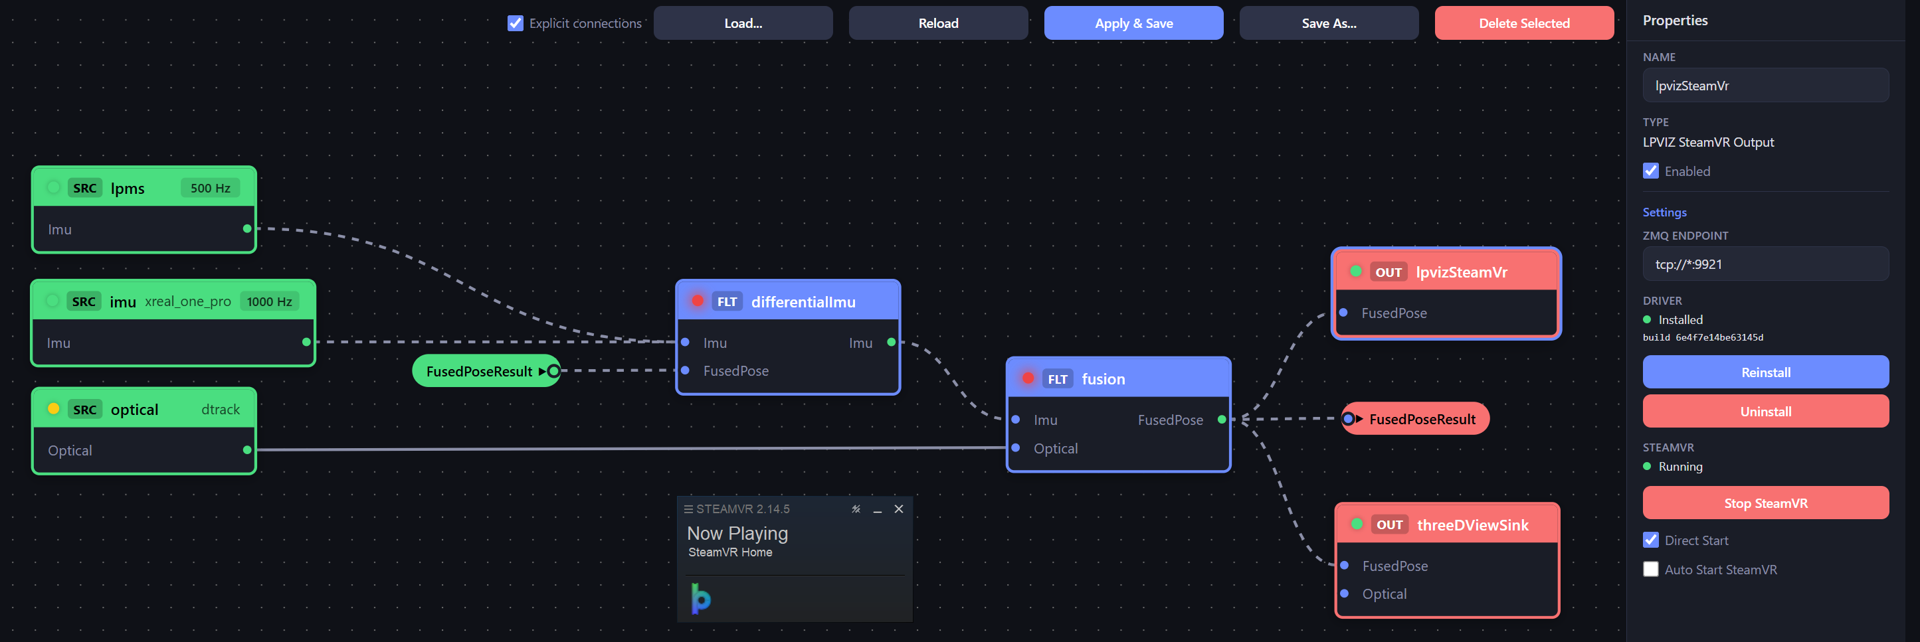
- Back in FusionHub check the properties in the LPVIZ output node. It’ll show the option to install or re-install the LPVIZ driver as SteamVR plugin. Click install to install the driver, then click Start SteamVR to start SteamVR. This will activate the LPVIZ driver and you should then see SteamVR home through your Xreal One Pro.
 3. In order to connect your optical tracking system, inspect the properties of the optical node. See an example of a configuration with ART below. Consult with us if you have issues setting the correct parameters for your optical tracking setup. Note: The LPVIZ SteamVR driver is integrated with FusionHub RS. You don’t need to install any external driver apart from SteamVR itself.
Xreal Air 2 Ultra
The Xreal Air 2 Ultra setup is identical to the One Pro setup described above. The Xreal Air 2 Ultra doesn’t have an on-screen menu. Switch to side-by-side mode by pressing the volume-down button for 2s.