Optical Tracking with ART DTrack
Every headset setup on this site takes its global reference from an outside-in optical tracking system that tracks a marker target on the headset. This page describes how to prepare an ART system in its DTrack frontend so that its data reaches FusionHub, and how the optical source node in FusionHub is matched to it. It applies to a room or seating-buck installation (LPVR-CAD, LPVR-AIR) and to a SmartTrack 3 mounted in a vehicle (LPVR-DUO) alike. For everything beyond the settings named here, consult the DTRACK3 User’s Guide or the DTrack 4 User’s Guide.
OptiTrack systems are configured in Motive instead. The settings of the optical node for them are listed on the Optical Source node page.
Network
The camera controller, or the SmartTrack 3 with its built-in controller, and the DTrack PC must be in the same subnet, otherwise DTrack does not find the controller. To change the controller’s network configuration, insert a USB stick into the controller: it writes its configuration file onto the stick. Edit the file and insert the stick again.
DTrack only opens its configuration dialogs (body, output, synchronization) while the measurement is stopped. Start it again with Start afterwards.
Room calibration
Run the room calibration from the Tracking menu (or F5) with the calibration angle and wand. In the coordinate system options choose Power wall, which puts the Y axis up. This matches the default Room Directions of the optical node (right, up, backward) and is the setting the LP-Research configurations expect.
Place the calibration angle on a level part of the floor. If the angle is tilted, the horizon of the VR content is tilted too.
Camera synchronization
Set the camera frame rate to the refresh rate of the headset display, or to twice or half of it. The Varjo XR-4 runs at 90 Hz, the Apple Vision Pro at 90 or 100 Hz. The frame rate is set in the Sync Card settings of DTrack.
Headset marker target
Attach the marker target to the headset, open the body administration (Tracking menu or F8) and calibrate the target as a body:
- ART-made headset targets are recognized automatically from the DTrack target library (section 9.4.1 “Automatic Recognition via Target Library” of the DTrack guides linked above).
- For other targets, load the body file supplied by LP-Research or ART in the body calibration dialog, or calibrate a new body from a measurement.
Start the measurement. When the target is inside the tracking volume, the body is shown as tracked.
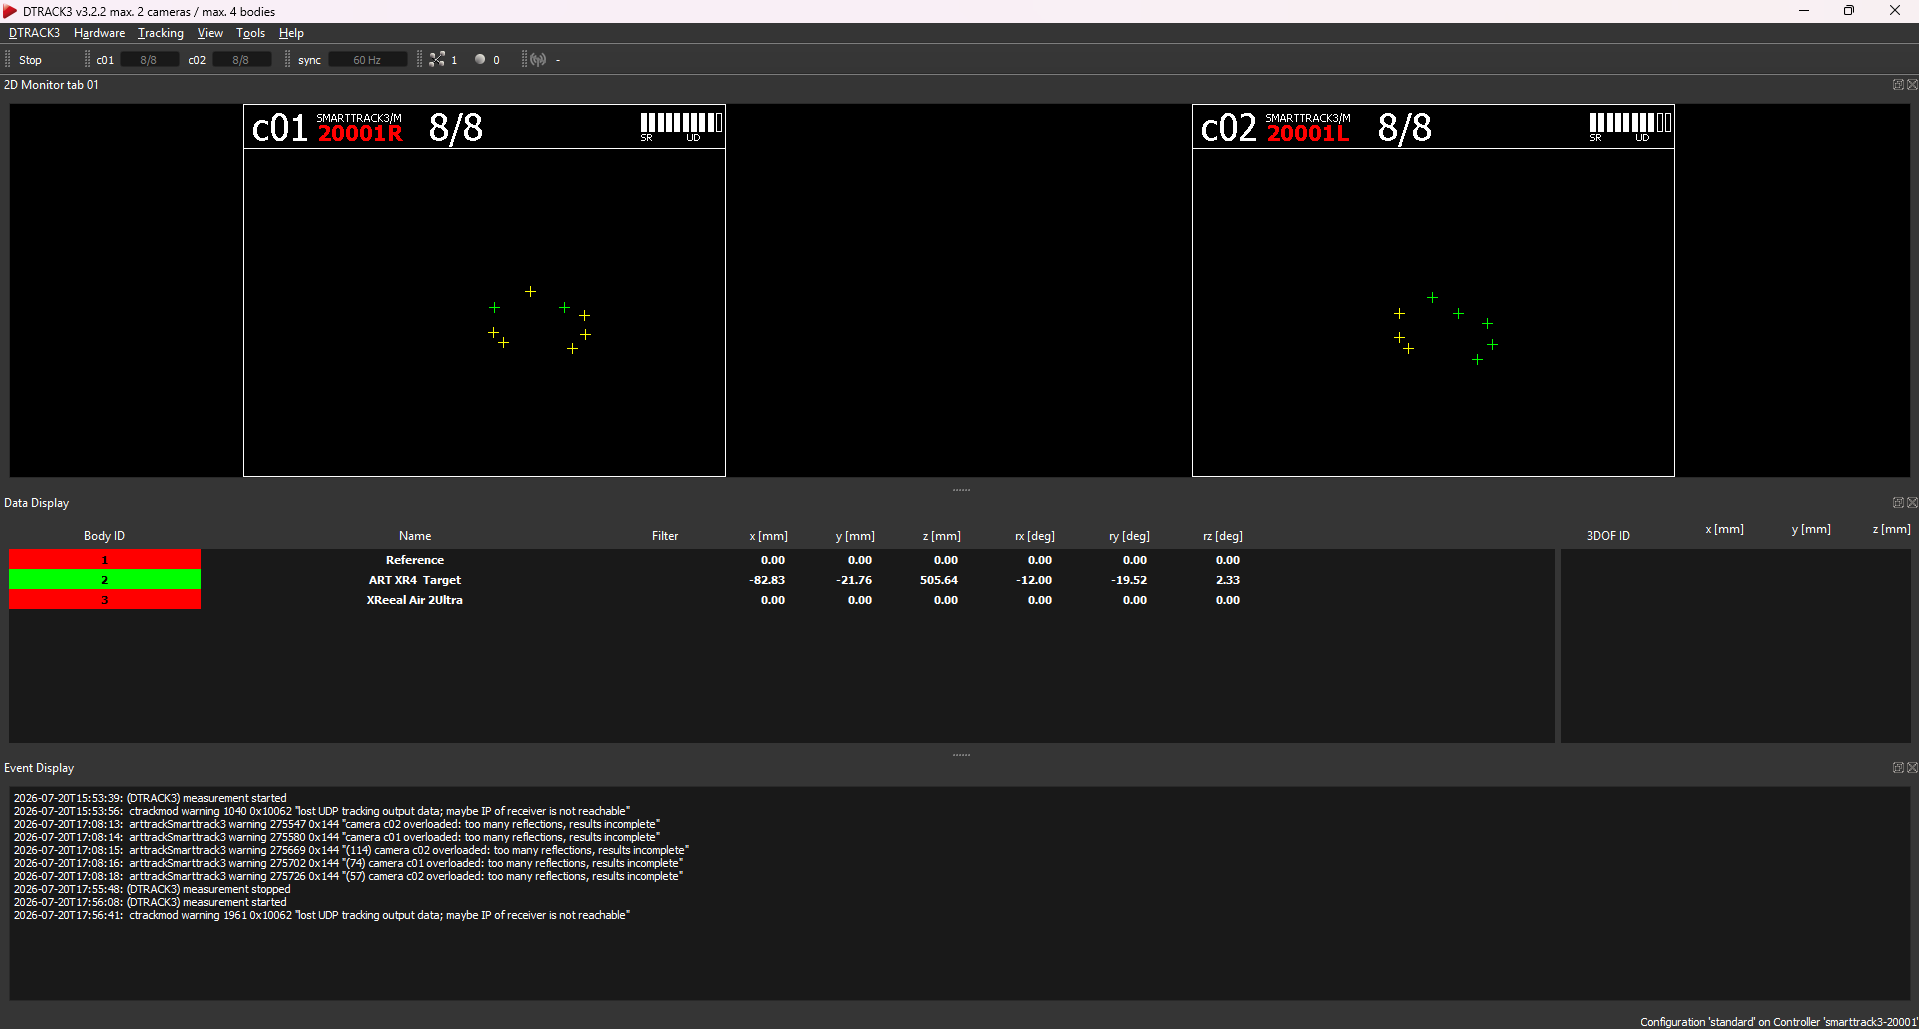
The body frame should follow the SteamVR convention: X to the right, Y up, Z pointing backward out of the user’s head, origin roughly between the eyes. An exact alignment by hand is not necessary. The headset calibration in FusionHub measures the remaining rotation and rewrites the body geometry on the controller, see the Headset Calibration Tutorials. If the tracking lags behind, try the medium prediction filter in the body settings.
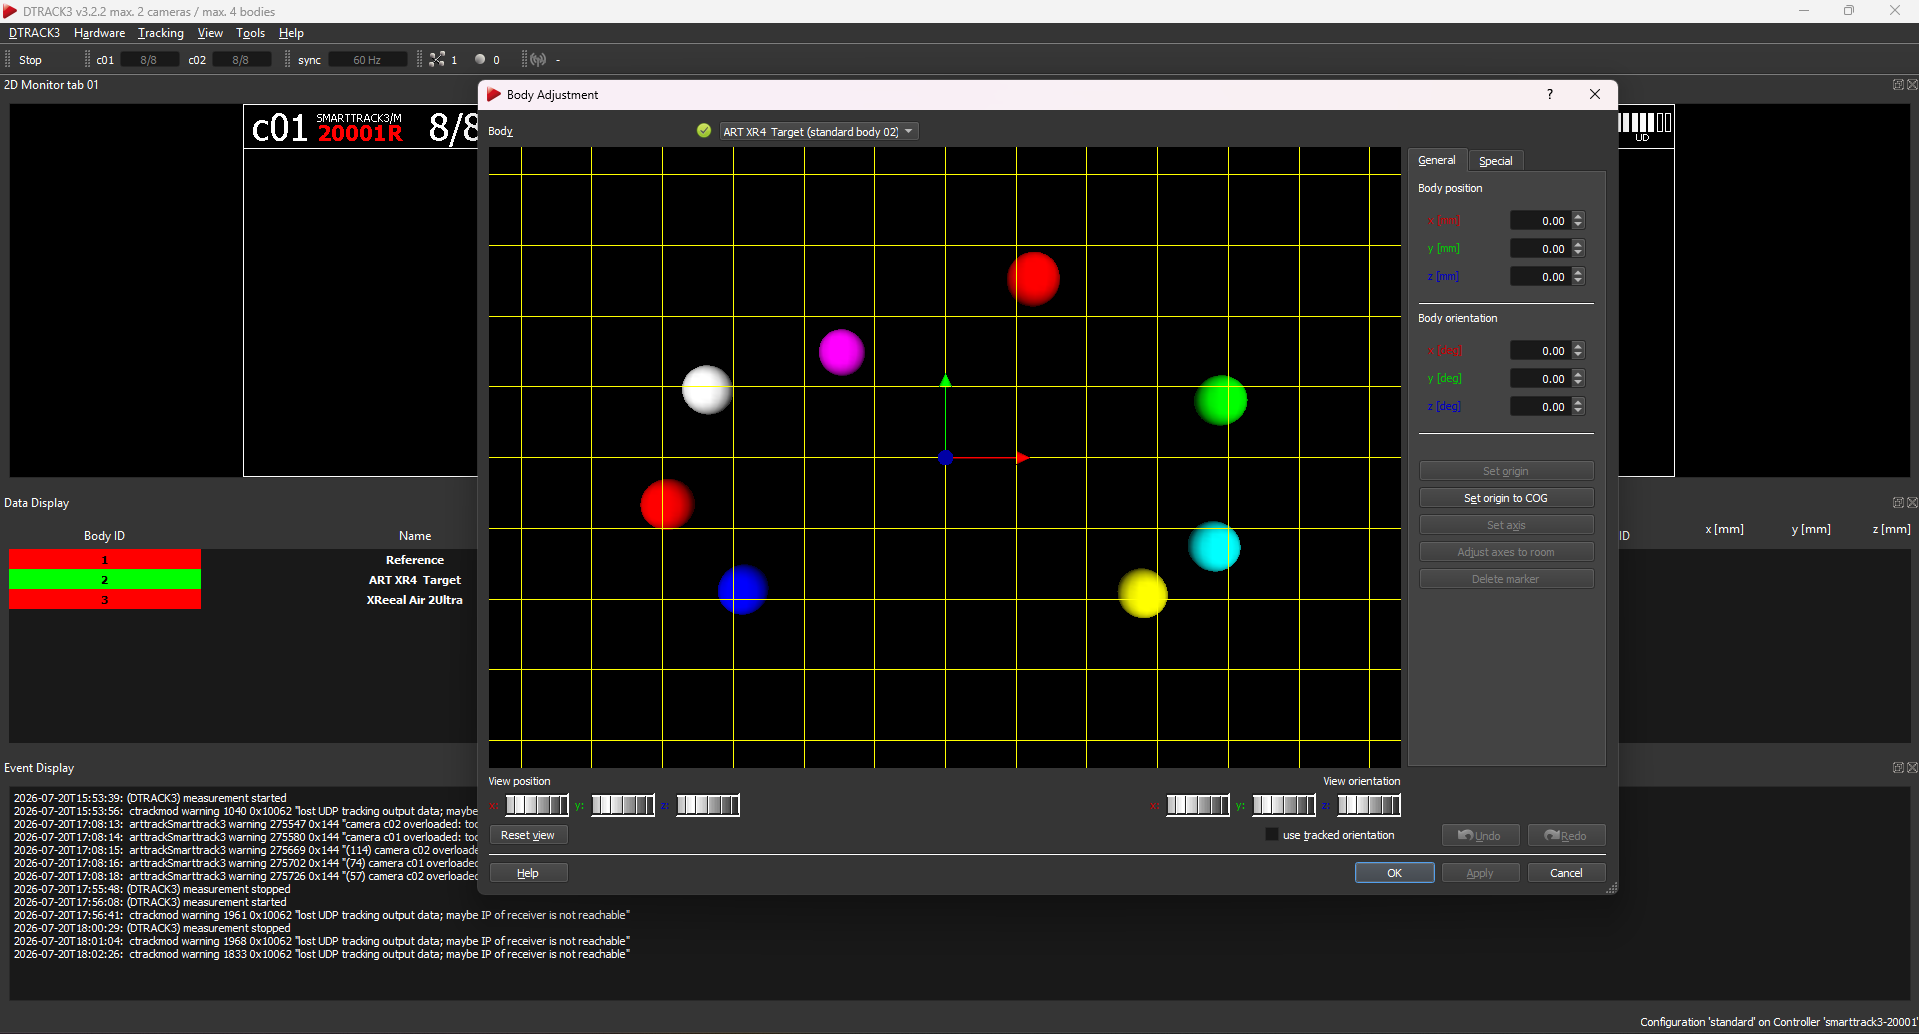
Note the ID of the body. DTrack counts from 1.
Output to FusionHub
In the DTrack output settings, send the data to the PC that runs FusionHub:
- Tick this computer if DTrack and FusionHub run on the same PC (recommended). Otherwise enter the IP address of the FusionHub PC.
- Use UDP port 5000, the default of the optical node, or note the port you choose.
- Enable the ts (timestamp) and 6d (6-DOF bodies) outputs. FusionHub also reads 6dmt for ART measurement tools used in Point Calibration. Other outputs are ignored.
- Do not enable outputs to addresses that are not present in the network, they slow down the communication. Act as router is only needed if the DTrack PC bridges two subnets.
If the optical node stays at zero data rate although the measurement is running, check the Windows firewall on the FusionHub PC. It must allow FusionHub to receive UDP.
The optical source node
Select the optical node in the FusionHub node editor and open its properties.
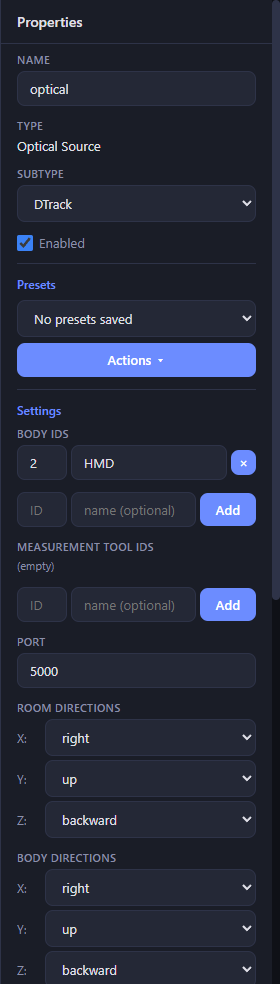
| Property | Setting |
|---|---|
| Subtype | DTrack |
| Port | The UDP port from the DTrack output settings, 5000 by default |
| Body IDs | The DTrack bodies FusionHub publishes, each as ID plus a name. The headset target is usually 1 = hmd. Bodies not in the list are ignored. |
| Room Directions | right, up, backward for a Power wall calibration |
| Body Directions | right, up, backward for a body in the SteamVR convention |
| Jump Gate | Optional. Rejects frames whose pose moves implausibly fast, which happens when a partially occluded target is fitted wrongly. |
All properties, including Room Offset, the world transform written by point calibration and the jump gate thresholds, are described on the Optical Source node page.
Click Activate. The optical node on the Dashboard now shows the DTrack frame rate as its data rate, and the DTrack Control page under Tools lists the bodies with their tracking state.
Additional bodies
Everything DTrack tracks can be forwarded to FusionHub the same way: calibrate the object as a body in DTrack and add its ID and a name to the Body IDs list. FusionHub publishes each body as its own optical stream.
- Hand controllers: attach marker holders with at least three markers to VIVE or Index controllers and calibrate each as a body. Align the body frame to the SteamVR controller convention: origin under the touchpad, Y up through the touchpad, Z along the handle towards the user, X to the right. Add them as
2 = leftCtrland3 = rightCtrl. Varjo XR-4 controllers are tracked by Varjo Base relative to the headset and need no entry here. - Tracked objects: a steering wheel, a stick or any other physical object gets an optical target, a body and an entry in the list. To make its pose refer to the object’s own CAD frame instead of the arbitrary marker position, use the tracked-object mode of Point Calibration.